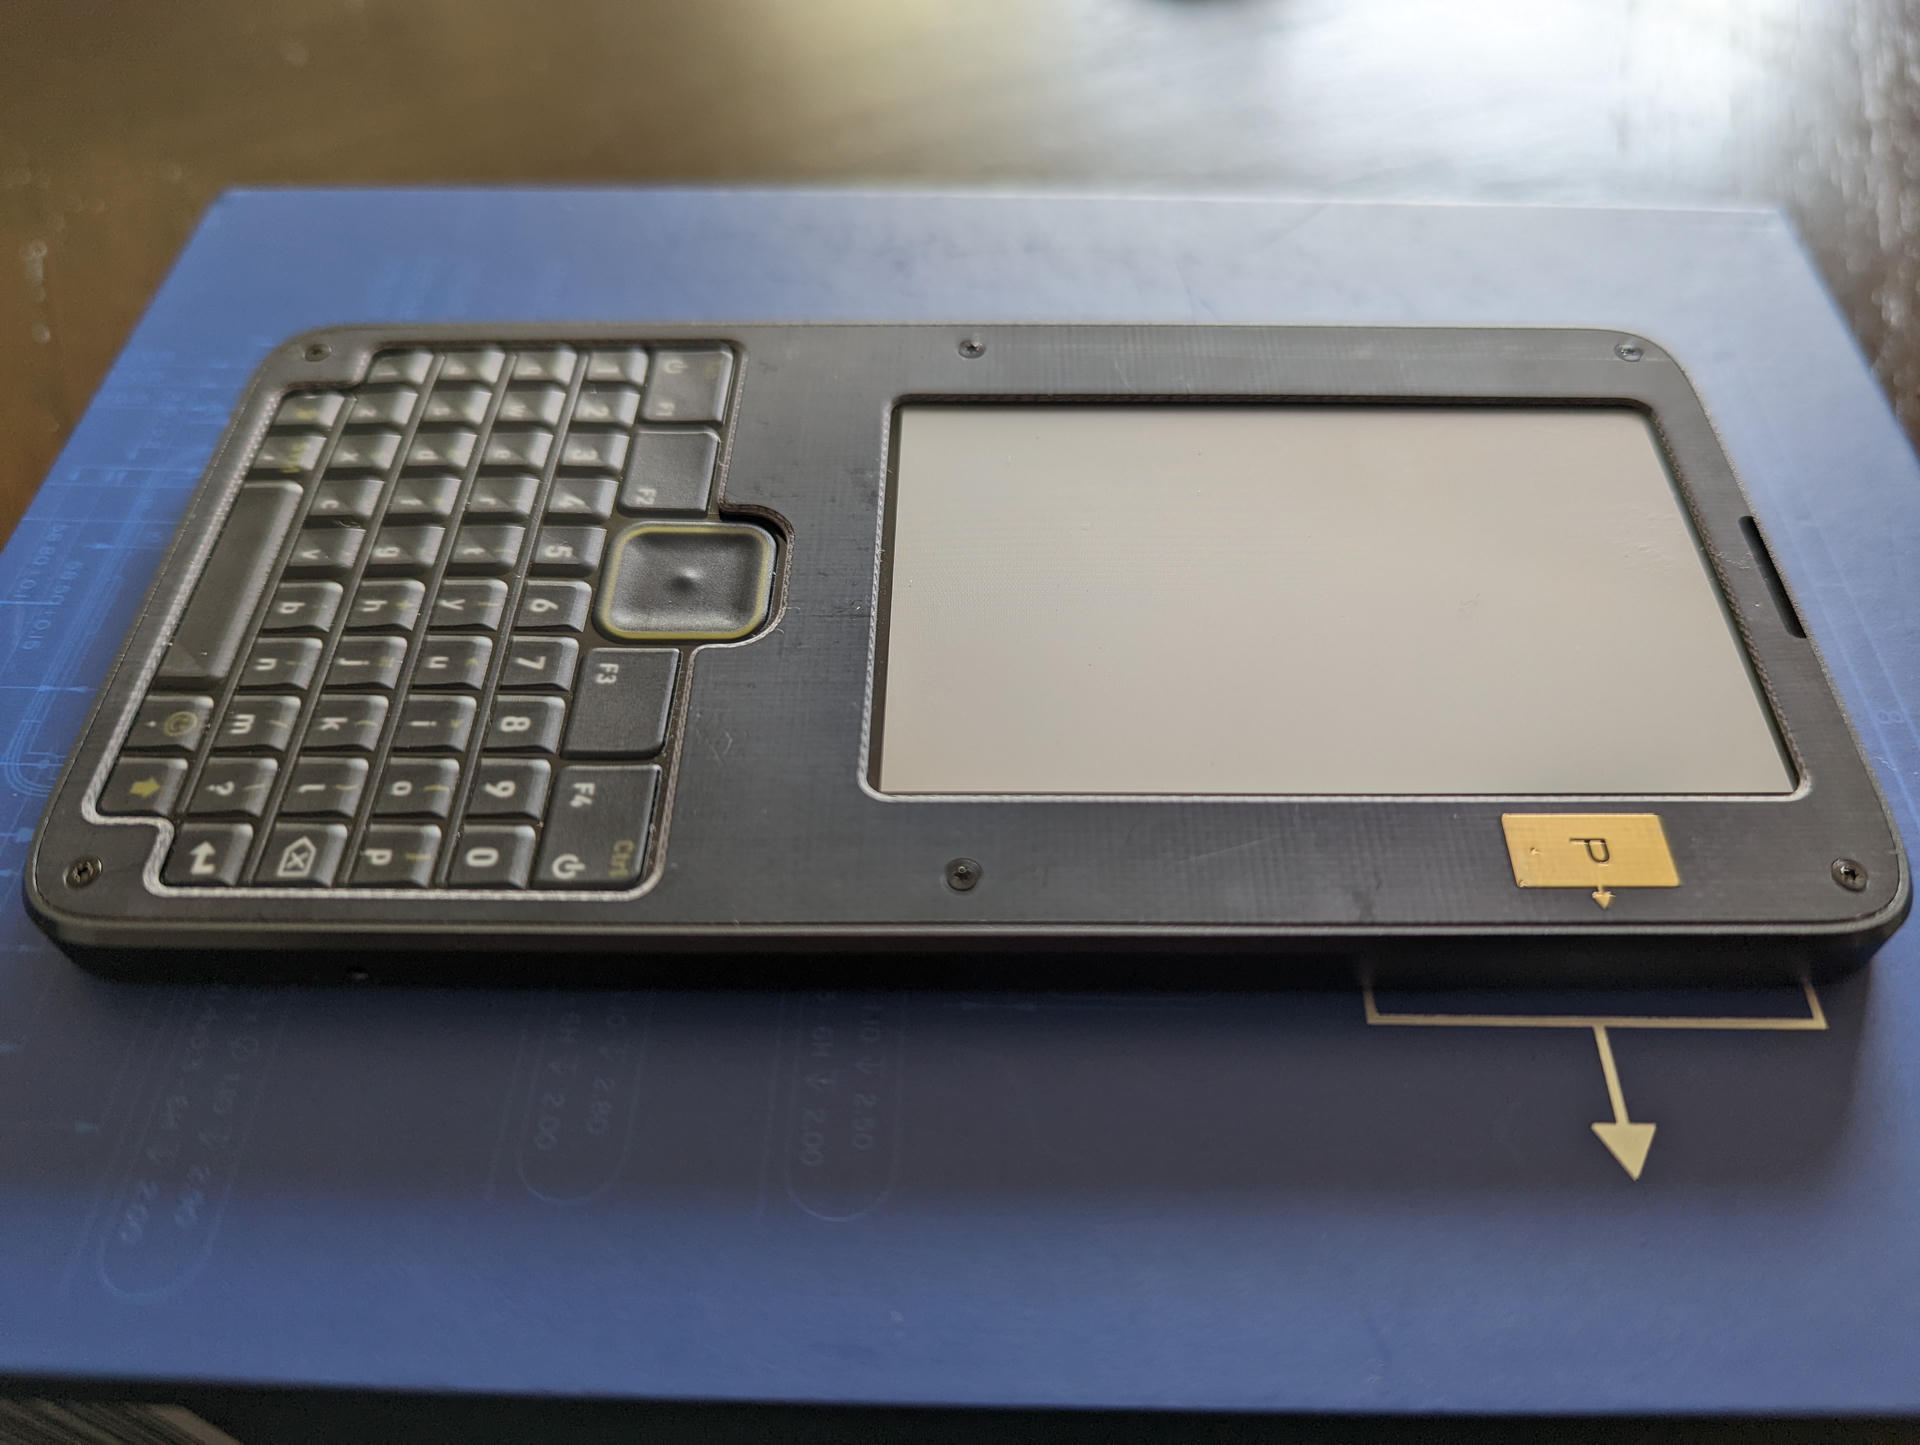
A few years ago, I saw bunnie's Precursor on Crowd Supply and instantly fell in love. The idea enamored me despite hardly knowing what FPGAs were at the time.
Embedded development has always been a fun hobby of mine, and I think it's an excellent pursuit for any developer to improve their knowledge. If you like Rust (like me), some great starting points are the nRF52840s, the ESP32-C3-DevKitC-02, or one of the TockOS boards (like the Hail).
While I love those, one thing I've wanted for a long time was a portable board with a battery, screen, keyboard, SDR, and user-servicable parts that could be hacked on top to bottom.
The Precursor offers all of the above list (except, sadly, the SDR) and is powered by a XC7S50-1L CSG324I System-on-Chip (SoC) running the open Betrusted SoC and an iCE40UP5K SG48 Embedded Controller (EC) running the open Betrusted EC on an open hardware design. It seems almost perfect for me.
Well... I finally convinced myself to order one as a reward for doing a big thing, and it has now arrived! So, let's explore!
This article is essentially a collection of notes for myself about how I set things up, configuration of my toolchain (on Arch Linux), how to do some basic tasks, and share my curiousity.
It may not be an up to date reference, or contain any novel information not discoverable in existing documentation. That is not the intent.
Development Toolchain Setup
The Precursor runs the Xous Microkernel built with a custom target called riscv32imac-unknown-xous-elf which targets the Betrusted SoC. Building this custom target requires a RISC-V cross compiler toolchain.
Let's go through source building the toolchain for our own Xous Kernel.
RISC-V cross compiler toolchain
The RISC-V Collab GNU toolchain offers a good, trustworthy toolchain for our efforts. We'll start with the prerequisites:
sudo pacman -S \
    base-devel \
    git \
    autoconf \
    automake \
    curl \
    python3 \
    libmpc \
    mpfr \
    gmp \
    gawk \
    base-devel \
    bison \
    flex \
    texinfo \
    gperf \
    libtool \
    patchutils \
    bc \
    zlib \
    expat
Next we'll fetch and bootstrap the toolchain into result of the source directory:
cd ~/git
mkdir riscv-collab
cd riscv-collab
git clone git@github.com:riscv-collab/riscv-gnu-toolchain.git
cd riscv-gnu-toolchain
./configure --prefix=`pwd`/result --enable-multilib
make -j32
Finally, add the resulting binaries to your PATH environment variable:
# ~/.bashrc
# ...

export PATH="$PATH:$HOME/git/riscv-collab/riscv-gnu-toolchain/result/bin"
Open a new terminal and enter riscv64 then hit tab, we should see something like:
[ana@architect riscv-gnu-toolchain]$ riscv64-
riscv64-linux-gnu-addr2line        riscv64-linux-gnu-gcc-ar           riscv64-linux-gnu-nm               riscv64-unknown-elf-as             riscv64-unknown-elf-gcc-ranlib     riscv64-unknown-elf-nm
riscv64-linux-gnu-ar               riscv64-linux-gnu-gcc-nm           riscv64-linux-gnu-objcopy          riscv64-unknown-elf-c++            riscv64-unknown-elf-gcov           riscv64-unknown-elf-objcopy
riscv64-linux-gnu-as               riscv64-linux-gnu-gcc-ranlib       riscv64-linux-gnu-objdump          riscv64-unknown-elf-c++filt        riscv64-unknown-elf-gcov-dump      riscv64-unknown-elf-objdump
riscv64-linux-gnu-c++              riscv64-linux-gnu-gcov             riscv64-linux-gnu-ranlib           riscv64-unknown-elf-cpp            riscv64-unknown-elf-gcov-tool      riscv64-unknown-elf-ranlib
riscv64-linux-gnu-c++filt          riscv64-linux-gnu-gcov-dump        riscv64-linux-gnu-readelf          riscv64-unknown-elf-elfedit        riscv64-unknown-elf-gdb            riscv64-unknown-elf-readelf
riscv64-linux-gnu-cpp              riscv64-linux-gnu-gcov-tool        riscv64-linux-gnu-size             riscv64-unknown-elf-g++            riscv64-unknown-elf-gdb-add-index  riscv64-unknown-elf-run
riscv64-linux-gnu-elfedit          riscv64-linux-gnu-gprof            riscv64-linux-gnu-strings          riscv64-unknown-elf-gcc            riscv64-unknown-elf-gprof          riscv64-unknown-elf-size
riscv64-linux-gnu-g++              riscv64-linux-gnu-ld               riscv64-linux-gnu-strip            riscv64-unknown-elf-gcc-11.1.0     riscv64-unknown-elf-ld             riscv64-unknown-elf-strings
riscv64-linux-gnu-gcc              riscv64-linux-gnu-ld.bfd           riscv64-unknown-elf-addr2line      riscv64-unknown-elf-gcc-ar         riscv64-unknown-elf-ld.bfd         riscv64-unknown-elf-strip
riscv64-linux-gnu-gcc-12.1.0       riscv64-linux-gnu-lto-dump         riscv64-unknown-elf-ar             riscv64-unknown-elf-gcc-nm         riscv64-unknown-elf-lto-dump
Next, we'll use this to build the Rust target.
riscv32imac-unknown-xous-elf Rust Target
The custom Rust target can be built by using the provided scripts in the repository. First, we need a native Rust toolchain:
sudo pacman -S \
    git \
    rustup
rustup toolchain install stable
rustup default stable
Then add the toolchain to the PATH environment like before:
# ~/.bashrc
# ...

export PATH="$PATH:$HOME/git/riscv-collab/riscv-gnu-toolchain/result/bin:$HOME/.cargo/bin"
In a new terminal enter cargo --help and make sure you get a help document:
[ana@architect ~]$ cargo --help
Rust's package manager

USAGE:
    cargo [+toolchain] [OPTIONS] [SUBCOMMAND]
# ...
Now let's fetch and build the custom target. The rebuild.sh script will to everything needed, including place the required things in the ~/.cargo folder, ready for use:
cd ~/git
mkdir betrusted-io
cd betrusted-io
git git@github.com:betrusted-io/rust.git
cd rust
./rebuild.sh
Xous Microkernel
Now for the more fun stuff! Xous is the operating system the Precursor runs.
To learn more about Xous, check out the Book!
There are a few prerequisites to get before we start:
sudo pacman -S \
    base-devel \
    git \
    openssl \
    libxkbcommon \
    python-pyusb \
    python-progressbar \
    python-pycryptodome \
    python-cryptography \
    python-pynacl
If you do Python development, you may prefer to use a
venv. I do not do Python development, so I do not do this.
Then fetch Xous:
cd ~/git
mkdir betrusted-io
cd betrusted-io
git clone git@github.com:betrusted-io/xous-core.git
cd xous-core
Xous uses the xtask convention for building images and running in hosted mode, but it's still possible to run normal commands though:
[ana@architect xous-core]$ cargo check
    Finished dev [unoptimized + debuginfo] target(s) in 0.13s
You can run Xous in hosted mode as well with cargo xtask run:
[ana@architect xous-core]$ cargo xtask run
Finished dev [unoptimized + debuginfo] target(s) in 0.10s
Running `target/debug/xtask run`
No apps specified, adding default apps...
Building gam status shellchat ime-frontend ime-plugin-shell graphics-server ticktimer-server log-server com xous-names keyboard trng llio susres codec sha2 engine-25519 spinor root-keys jtag net dns pddb modals usb-device-xous ball repl
Command: cargo build --features pddbtest --features ditherpunk --package gam --package status --package shellchat --package ime-frontend --package ime-plugin-shell --package graphics-server --package ticktimer-server --package log-server --package com --package xous-names --package keyboard --package trng --package llio --package susres --package codec --package sha2 --package engine-25519 --package spinor --package root-keys --package jtag --package net --package dns --package pddb --package modals --package usb-device-xous --package ball --package repl --release
Compiling ticktimer-server v0.1.0 (/home/ana/git/betrusted-io/xous-core/services/ticktimer-server)
Finished release [optimized] target(s) in 6.18s
Building and running kernel...
Command: cargo run --release -- ../target/release/gam ../target/release/status ../target/release/shellchat ../target/release/ime-frontend ../target/release/ime-plugin-shell ../target/release/graphics-server ../target/release/ticktimer-server ../target/release/log-server ../target/release/com ../target/release/xous-names ../target/release/keyboard ../target/release/trng ../target/release/llio ../target/release/susres ../target/release/codec ../target/release/sha2 ../target/release/engine-25519 ../target/release/spinor ../target/release/root-keys ../target/release/jtag ../target/release/net ../target/release/dns ../target/release/pddb ../target/release/modals ../target/release/usb-device-xous ../target/release/ball ../target/release/repl
Finished release [optimized] target(s) in 0.09s
Running `/home/ana/git/betrusted-io/xous-core/target/release/kernel ../target/release/gam ../target/release/status ../target/release/shellchat ../target/release/ime-frontend ../target/release/ime-plugin-shell ../target/release/graphics-server ../target/release/ticktimer-server ../target/release/log-server ../target/release/com ../target/release/xous-names ../target/release/keyboard ../target/release/trng ../target/release/llio ../target/release/susres ../target/release/codec ../target/release/sha2 ../target/release/engine-25519 ../target/release/spinor ../target/release/root-keys ../target/release/jtag ../target/release/net ../target/release/dns ../target/release/pddb ../target/release/modals ../target/release/usb-device-xous ../target/release/ball ../target/release/repl`
KERNEL: Xous server listening on 127.0.0.1:34003
KERNEL: Starting initial processes:
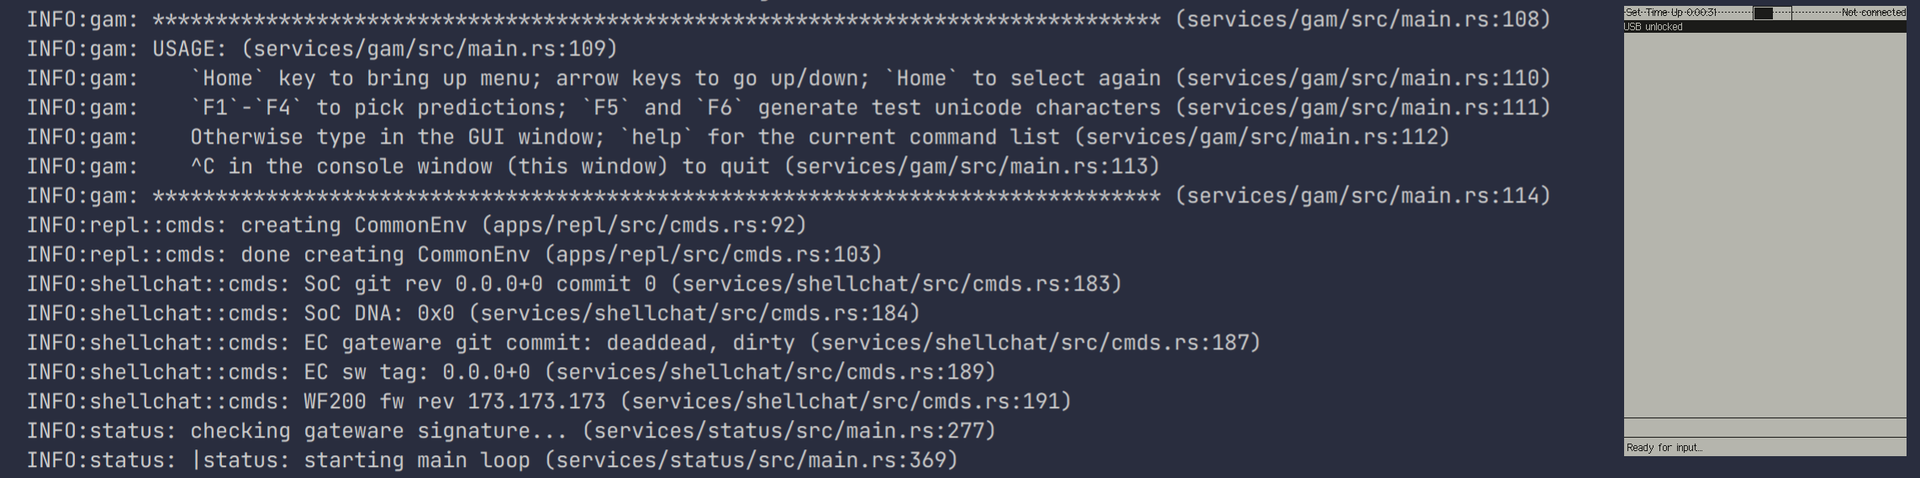
# ...While this "Hosted Mode" lets us test Xous running as a hosted microkernel on our local development machine, it's not a close analog for a real device. This mode is good for fast iteration, as well as debugging, as tools like gdb can be used.
To do that, we'll use Renode.
Renode Emulator
Renode lets us closely emulate a real Precursor and run development builds of Xous.
sudo pacman -S \
    base-devel \
    mono \
    gtk-sharp-2 \
    autoconf \
    automake \
    gtk2 \
    git
Then fetch and build Renode:
cd ~/git
mkdir renode
cd renode
git clone git@github.com:renode/renode.git
cd renode
./build.sh
Now create a nice little alias for renode:
# ~/.bashrc
# ...

alias renode="mono $HOME/git/renode/renode/output/bin/Release/Renode.exe"
In a new terminal, it should now be possible to run renode and have a window pop up.
Running Xous in Renode
Circling back to Xous, we can build an image suitable for Renode with:
cd ~/git/betrusted-io/xous-core
cargo xtask renode-image
Then run the REnode SCript with:
renode emulation/xous-release.rescThis will spawn several windows containing output from various debug ports of the emulated device
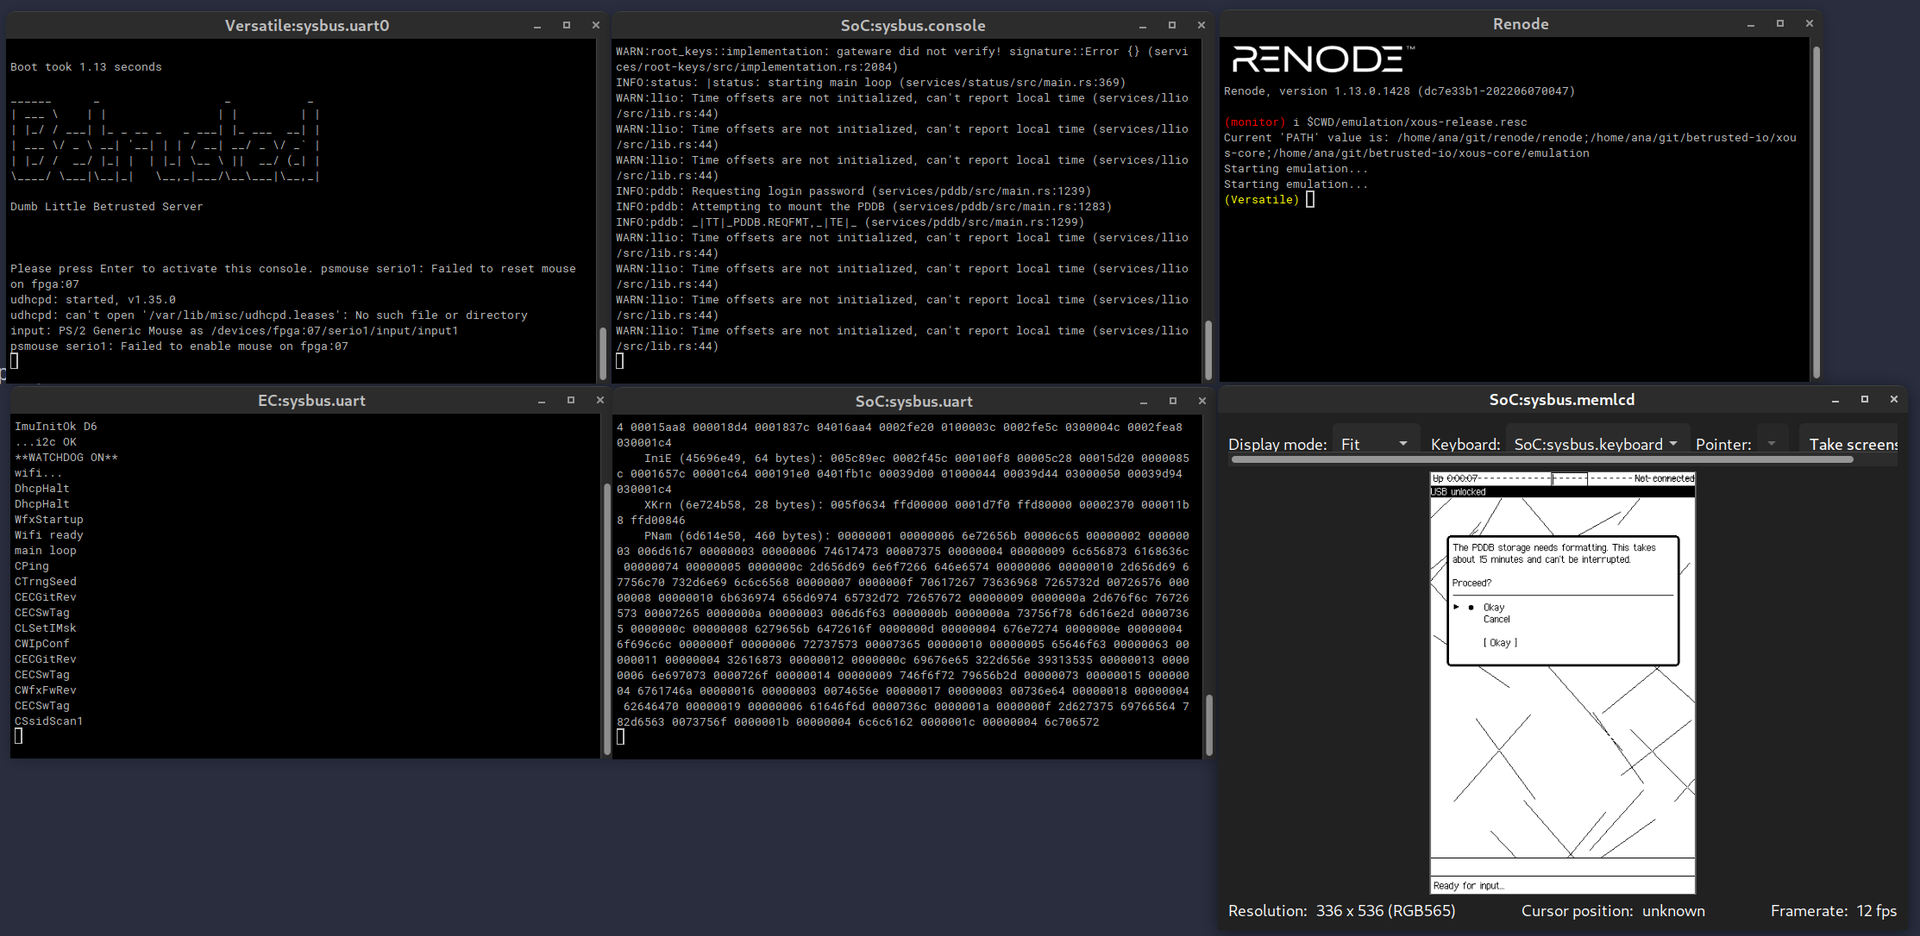
You can use your keyboard to interact with the emulated device. Most buttons will work, such as the arrow keys and return. To access the "System Menu" (think like your Windows/Super key on a workstation) hit Home.
First booting Xous
The first recommendation for Crowd Supply Backer devices is to update their device! We're going to update into the image we just tested in Renode.
Before we can actually install firmware, we need to add a udev rule, and ensure our user is in the precursor-dev group:
cat <<-EOF | sudo tee /etc/udev/rules.d/99-precursor-usb.rules
SUBSYSTEM=="usb", ATTRS{idVendor}=="1209", ATTRS{idProduct}=="5bf0", GROUP="precursor-dev", TAG+="uaccess"
EOF
sudo groupadd precursor-dev
sudo gpasswd -a $USER precursor-dev
sudo udevadm control --reload-rules
On Linux, changing a users groups requires them to relog before they can use that new group. So, relog if needed.
Let's follow along in dmesg as we plug in the Precursor for the first time:
[ana@architect hoverbear.org]$ sudo dmesg -W
[  364.252152] usb 1-5: new full-speed USB device number 4 using xhci_hcd
[  364.405950] usb 1-5: New USB device found, idVendor=1209, idProduct=5bf0, bcdDevice= 1.01
[  364.405958] usb 1-5: New USB device strings: Mfr=1, Product=2, SerialNumber=0
[  364.405960] usb 1-5: Product: Precursor pvt2
[  364.405963] usb 1-5: Manufacturer: Foosn
Since this is a fresh device and we're doing a first boot, we're going to run a factory reset:
pacman -S \
    wget
cd ~/git/betrusted-io/xous-core/tools
./factory_reset.sh -s -l en
Do not unplug your Precursor. It should, in theory, be fine as long as the 'wishbone' is intact, but let's not try this.
This will take a few minutes, it's a good time to make some hot tea, pet your dog, or anything else that doesn't involve unplugging your Precursor. My advice: Go rummage around for a paperclip shaped thing.
When it finished, we get the following message:
Erase finished
Resuming CPU.
Resetting SOC...
Please insert a paperclip in the hard reset hole in the lower right hand corner to ensure the new FPGA gateware is loaded.
After inserting the paperclip you will need to apply power via USB to boot.
IMPORTANT: you must run 'ecup auto' to update the EC with the staged firmware objects.
What did I say about that paperclip, huh? 😏
After inserting the paperclip, we are presented with this:
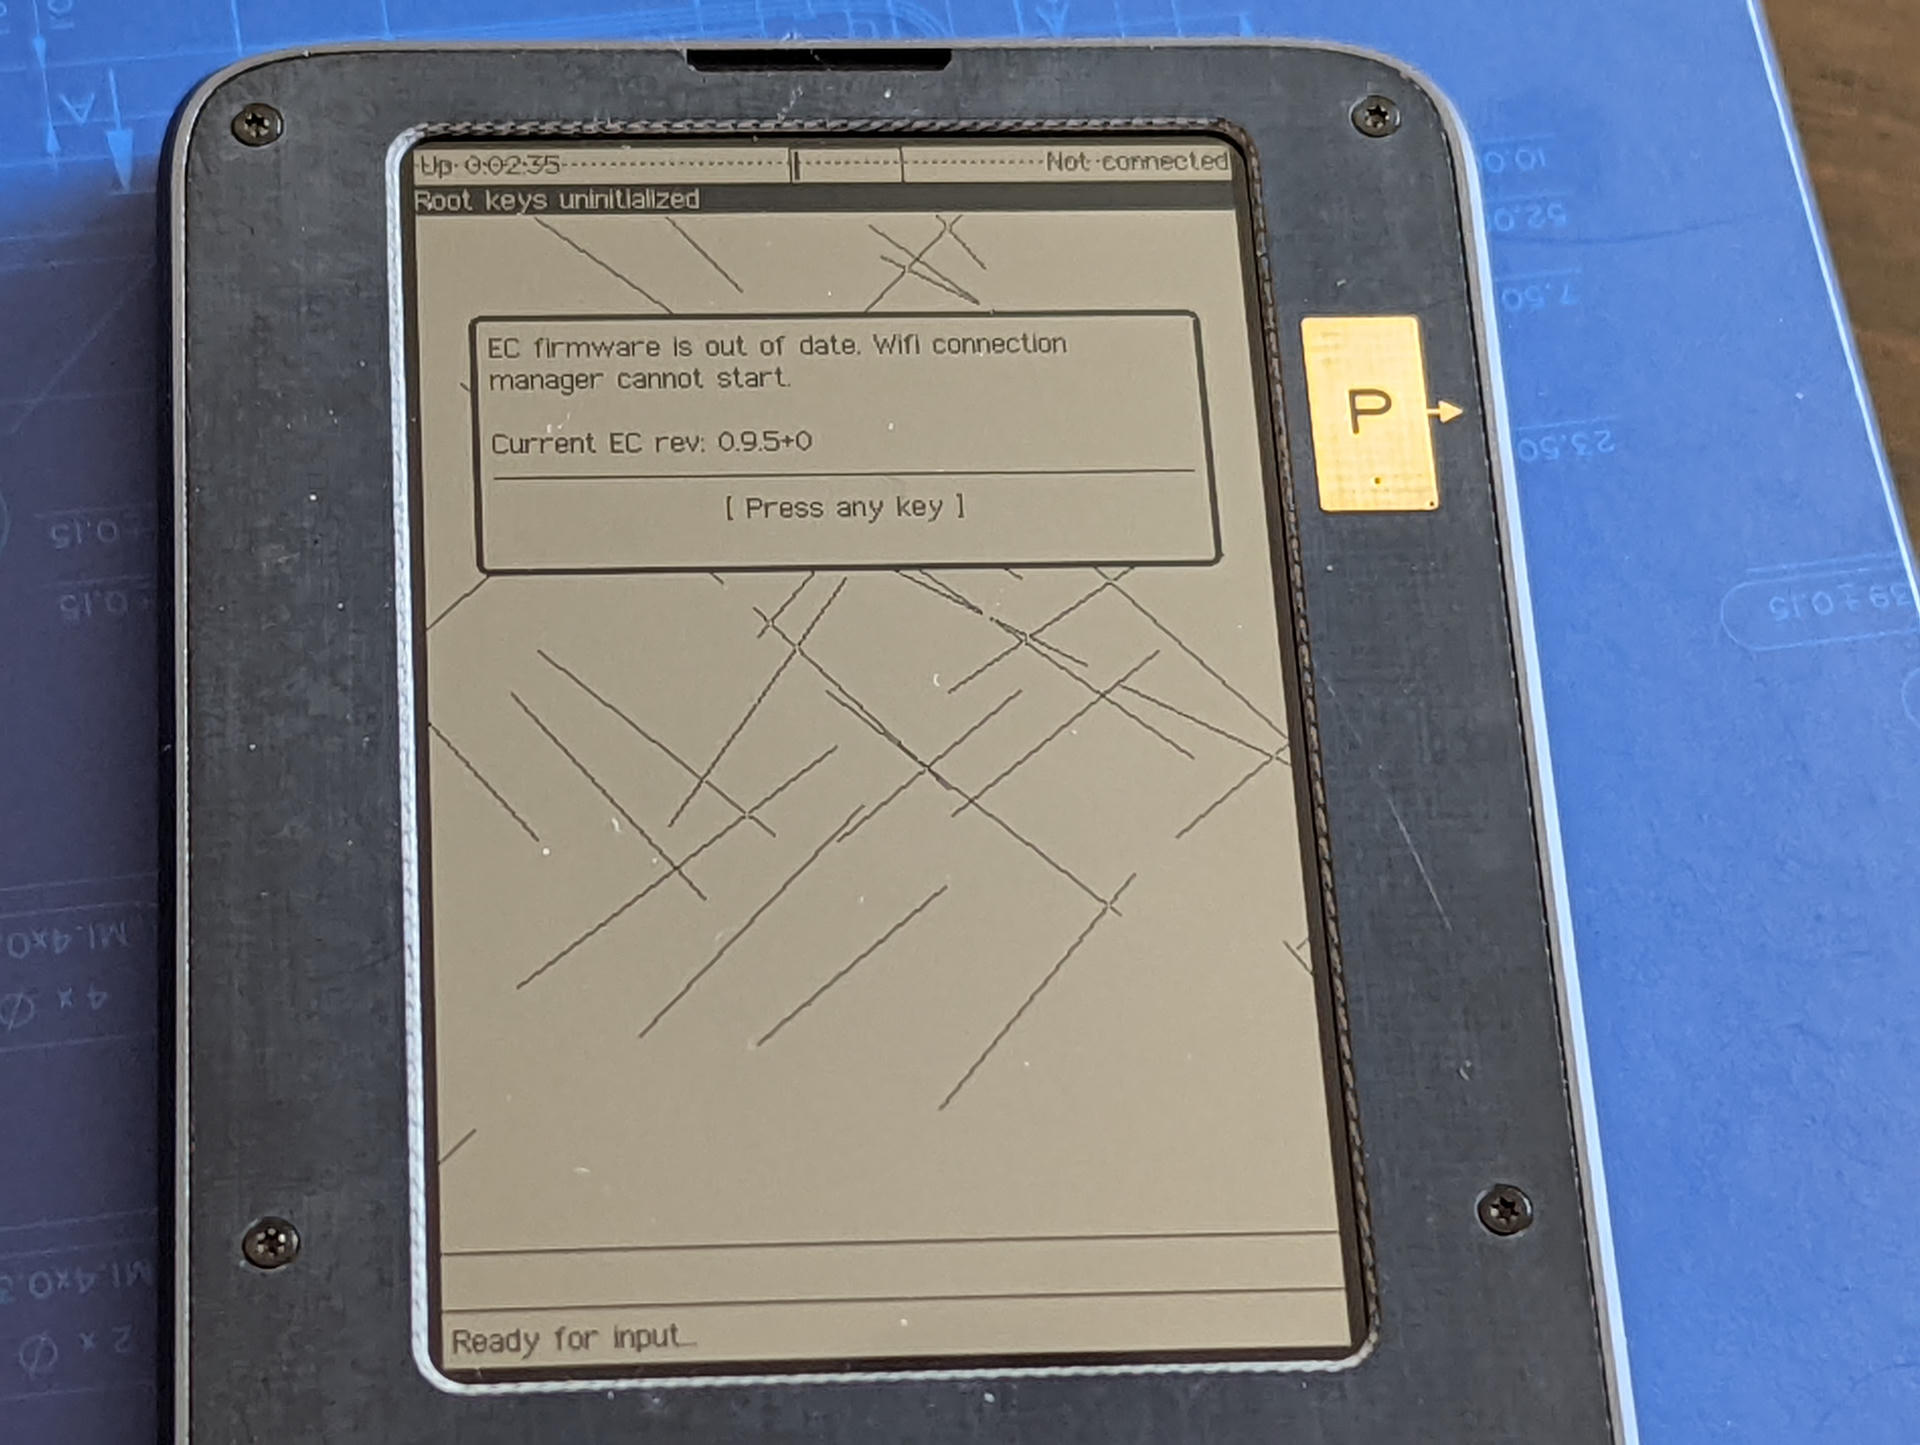
As instructed, entering ecup auto:
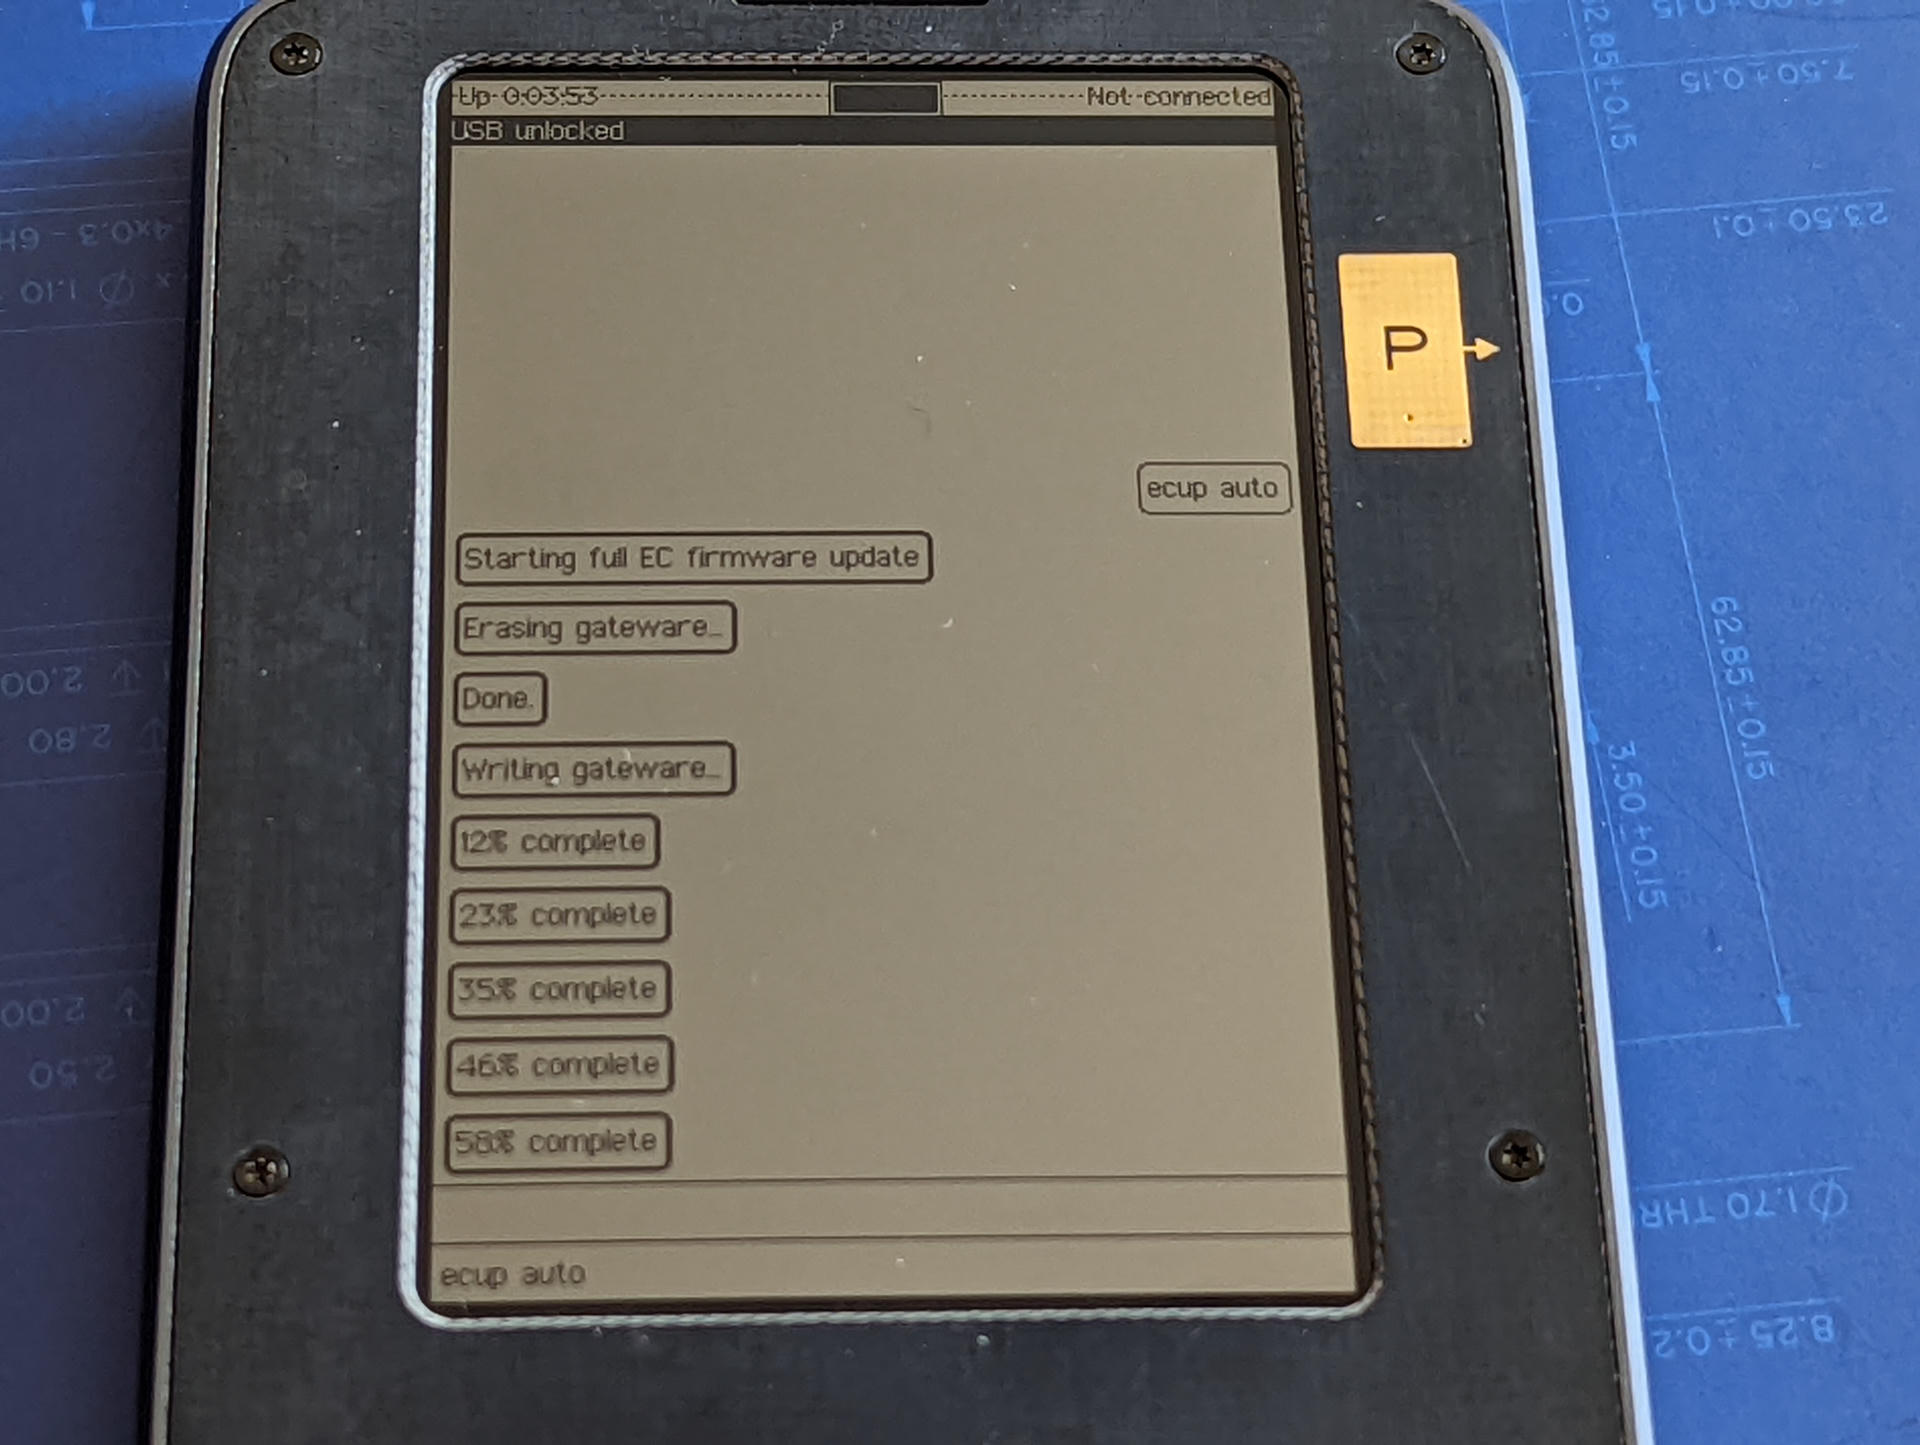
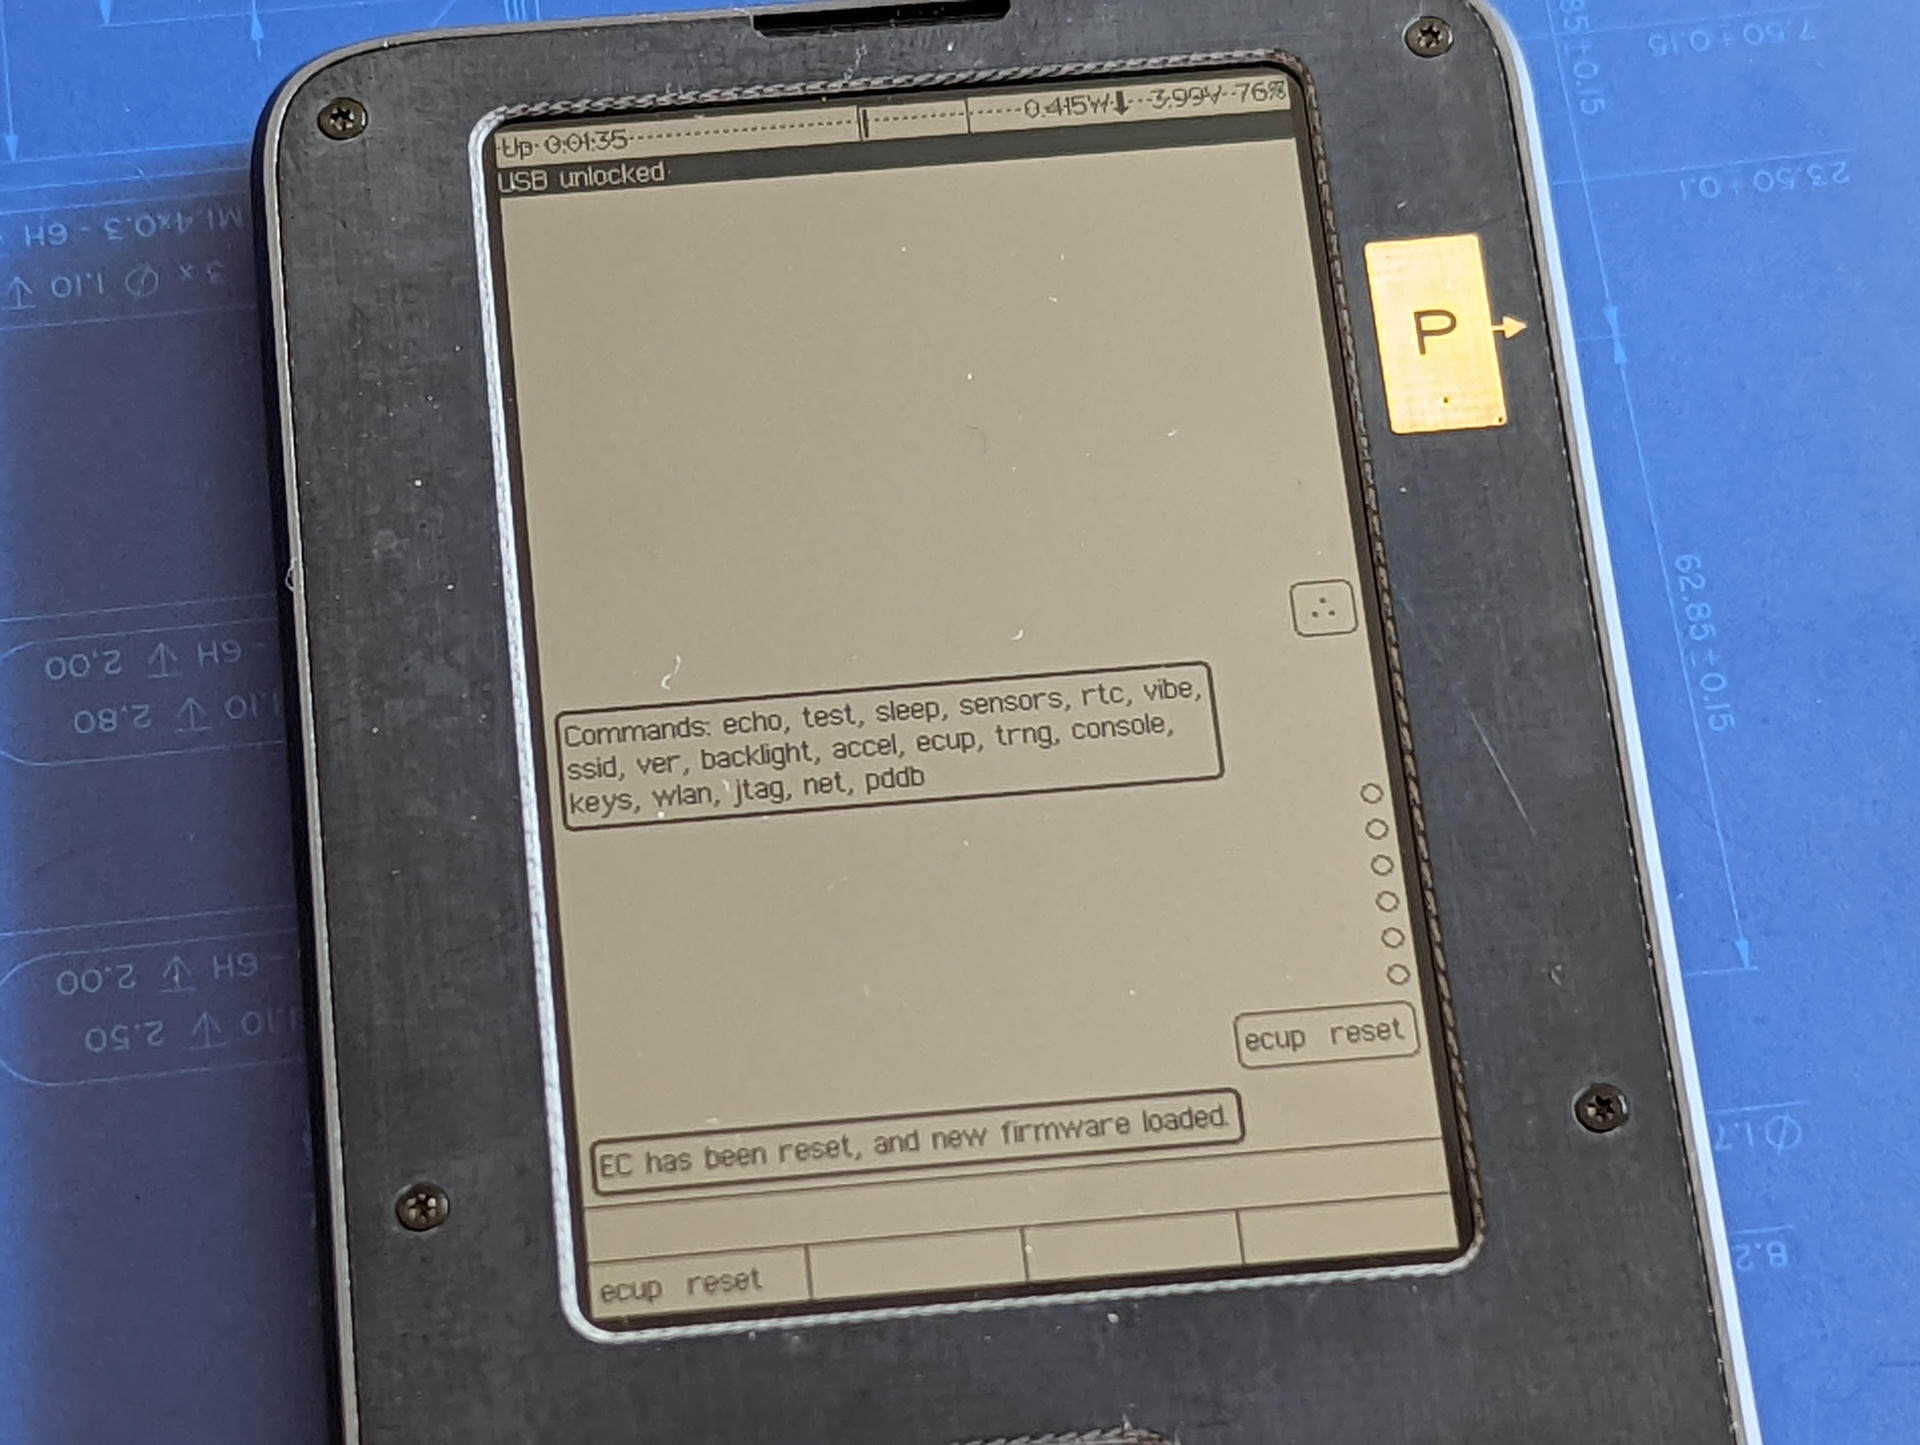
This process takes a few minutes, during it's process it suggests running ecup reset, when it's finished the device automatically turns off. We can turn the device back on by plugging it in. Once started, it may give a message about the EC firmware being out of date, fix that with ecup reset:
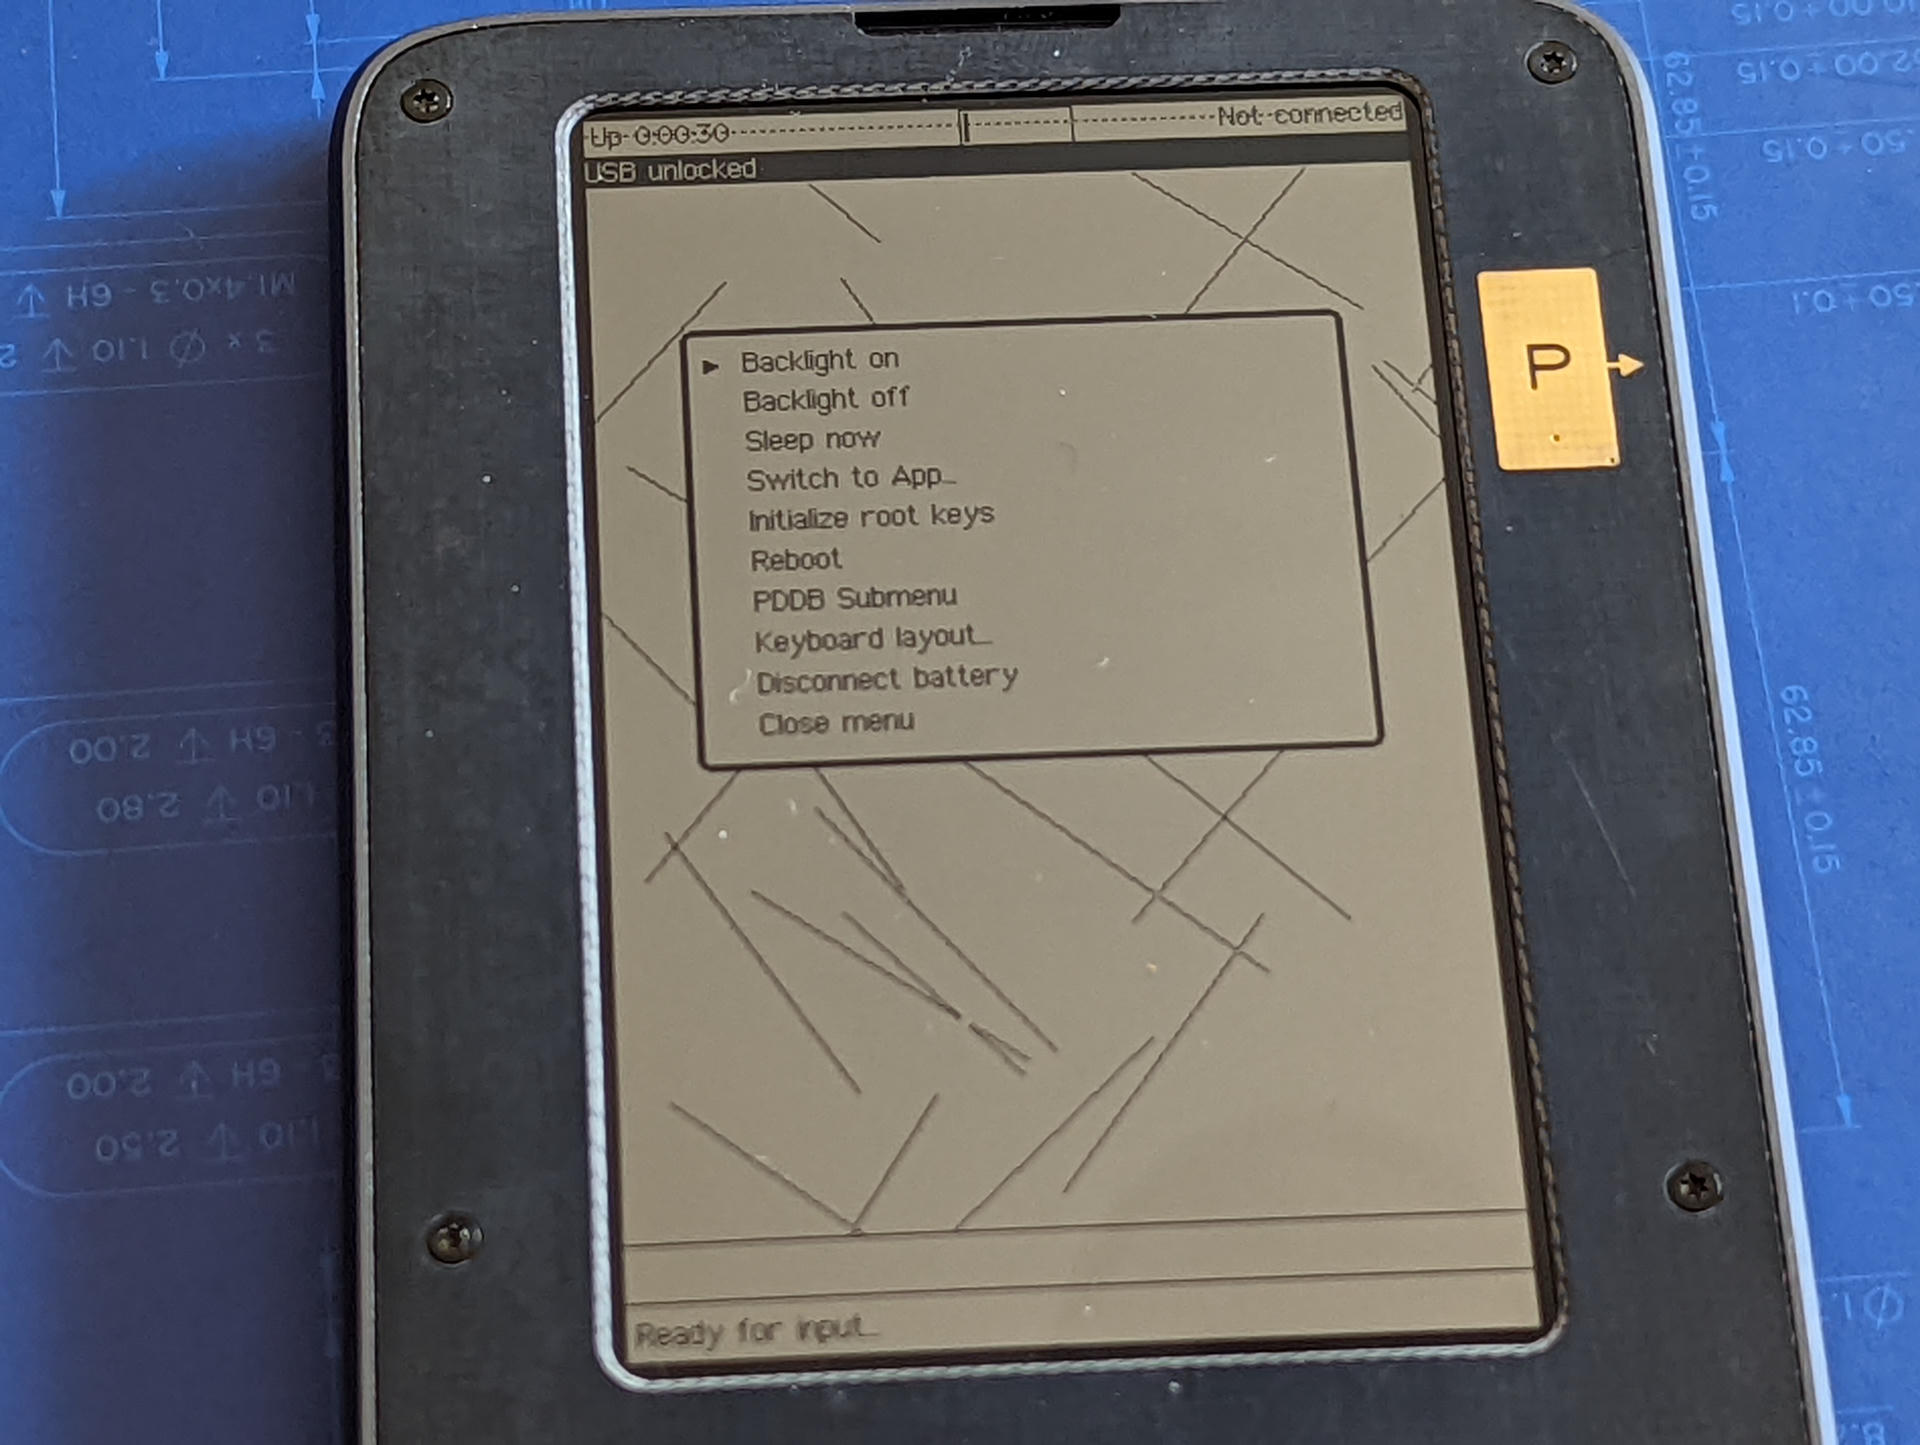
With that done, you can reboot from the home menu. Hit the exact center of the keyboard Nav button (the top middle D-pad like thing) to be greeted with this:
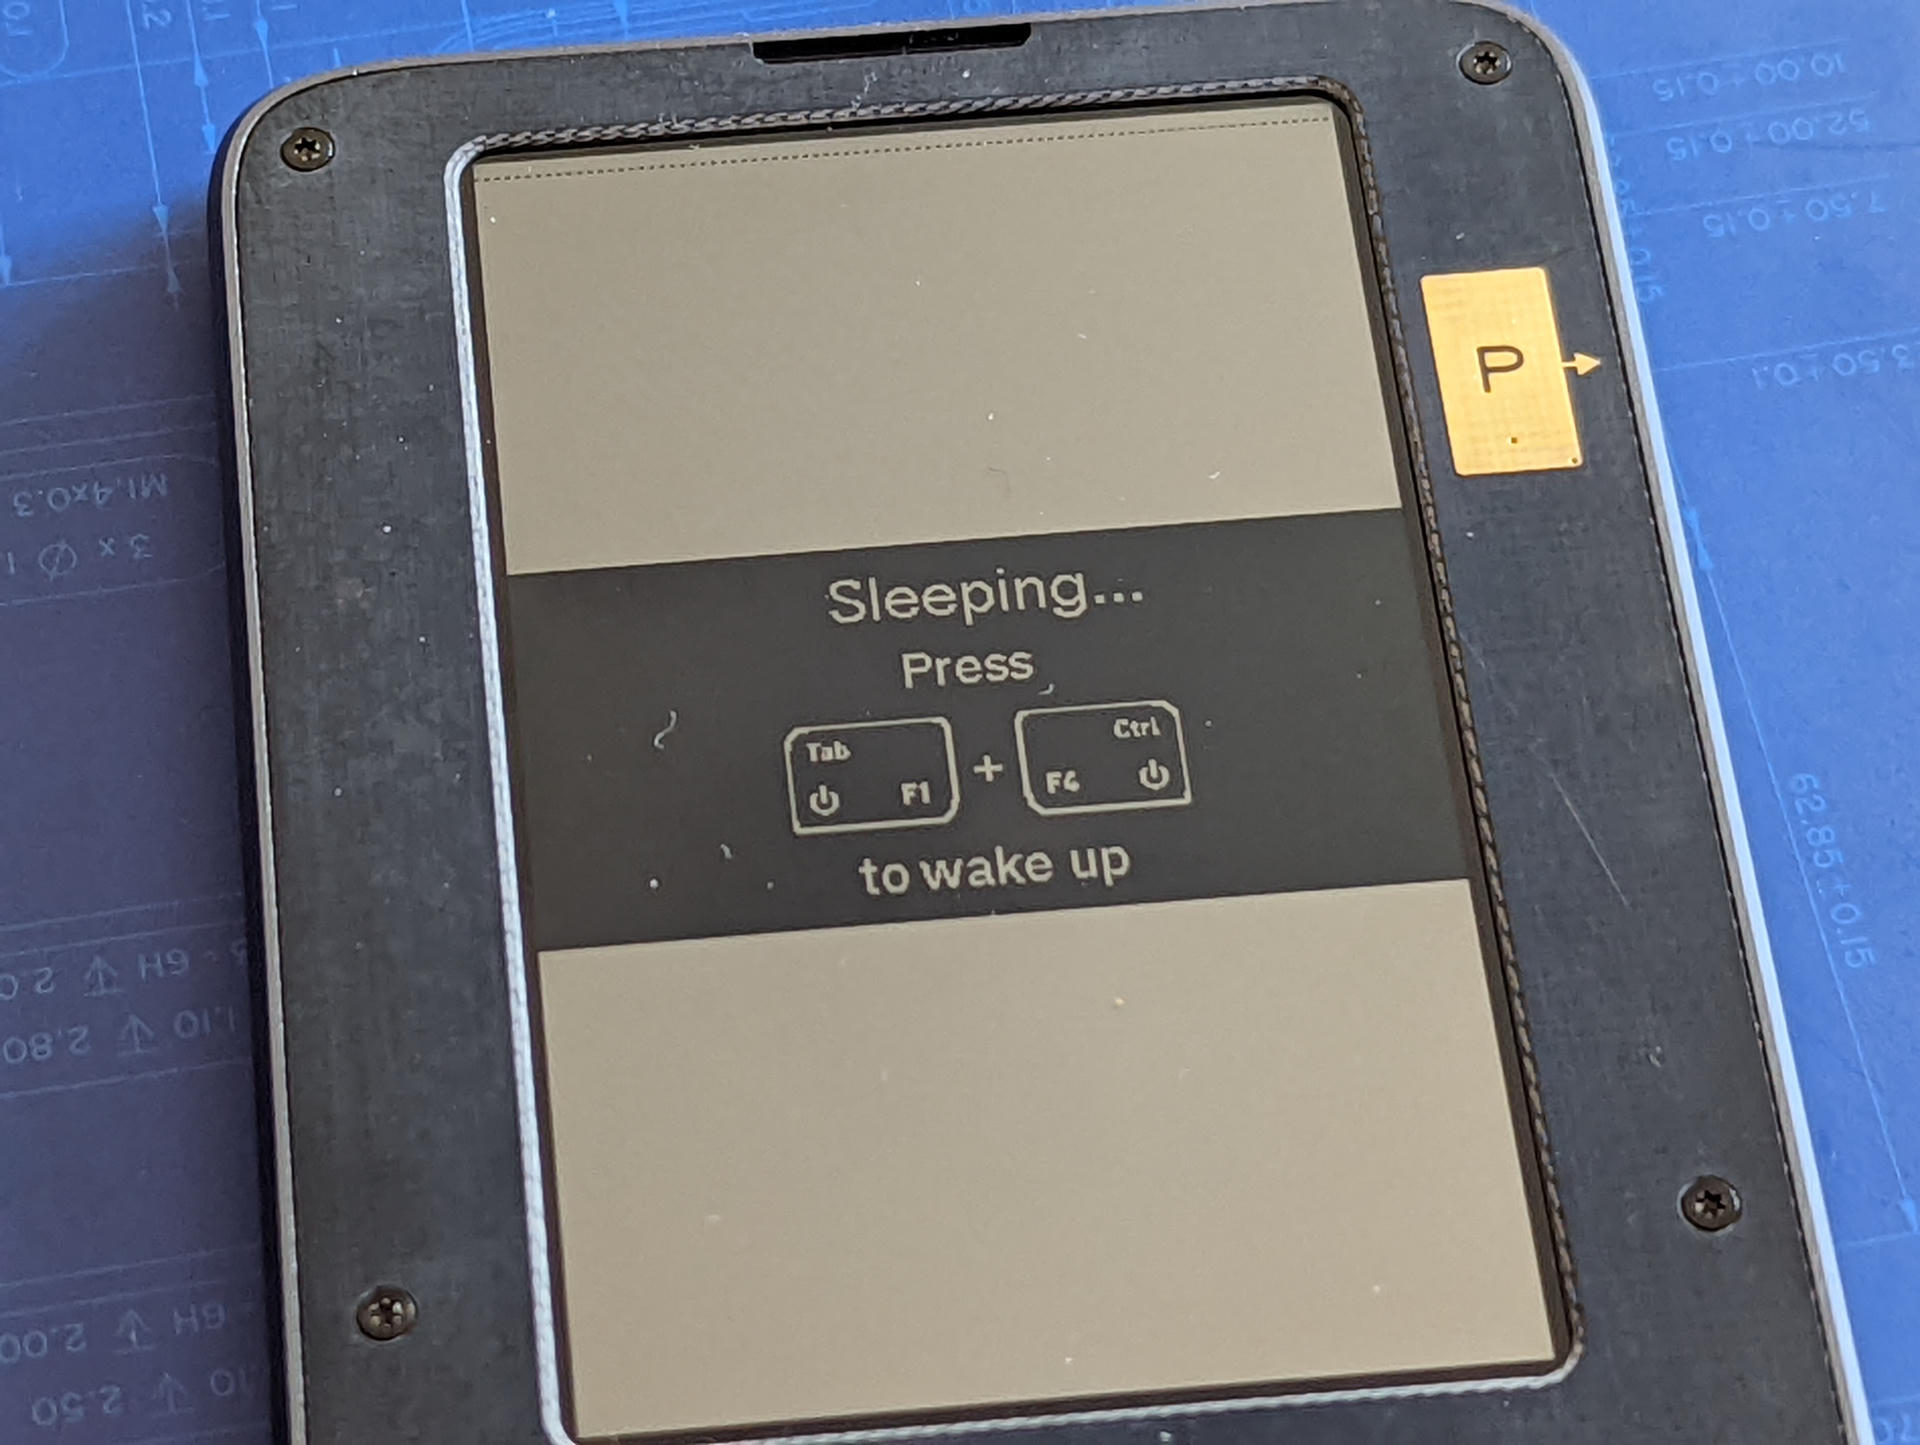
Once rebooted, any EC firmware message is gone, and we can put the device to sleep in the same home menu:
Installing our first Xous
Build the new hardware image:
cd ~/git/betrusted-io/xous-core
cargo xtask hw-image precursors/soc.svd
This creates:
target/riscv32imac-unknown-xous-elf/release/xous.imgtarget/riscv32imac-unknown-xous-elf/release/loader.bin
These interact with a corresponding "gateware" located at precursors/soc_csr.bin.
Now we'll update the SoC FGPA. Load the firmware:
cargo xtask burn-kernel
cargo xtask burn-loader
cargo xtask burn-soc
On the Precursor, hit the middle cursor button then pick 'Install Gateware Update'. (Not seeing it? I had initialized some root keys on first boot, if you didn't do that before, do that first!)
Upon selecting it, it will offer you a summary, give it a look, then start the process. A few minutes later, it should be done. Go back to the same menu and select 'Sign Xous Update'. When finished, reboot the device again from that same menu.
At this point, we have a source built Xous (built by a source built custom Rust target, that built by a source built RISC-V toolchain) running on the gateware provided by the Betrusted folks. For me, this is a good starting point to explore development. I'm content to take a break here and explore this new ecosystem more.
In a future article we might explore how to build our own gateware, create our own Xous apps, add OS features, or even modify the SoC or EC together.
In the meantime, I've been hanging out on the Betrusted Matrix group, feel free to stop by if you want to hack on Xous too!