
This is the second post of a series on settling into new servers. The first was about choosing a server. This post is specifically targetted at newly acquired VPS and Dedicated servers. We'll talk about installing our chosen distribution, configuring its basics, and familiarizing ourselves with the new metal.
What Distribution?
This choice is entirely dependent on your personal tastes and use case. Different distributions are catered well to different things, even different installation media of specific distributions are different enough to warrant considering.
You might be interested in Ubuntu if you're new to Linux or interested in doing things the 'Official' way the majority of the time. CentOS is another fantastic choice, particularly if you're seeking to learn more about the enterprise space. You'll find these two options on virtually every provider you work with, and should familiarize yourself with at least one.
Out of the others, Arch Linux is my particular favorite. To me, it's an umami distribution with (lots of) up-to-date signed packages, a simple core, amazing documentation, and a rolling release schedule. I've been using it for years and the original creator actually attended the same University I did. You may also have a distribution which you are very comfortable with, and you may choose to use it.
Servers do, though, have different requirements. You will not want to install a GUI specific distribution onto a headless server. Additionally, many providers will limit what can be installed on their machines. In some cases they offer a LARA, a direct console to the machine, for installation, but you'll need to verify this is possible.
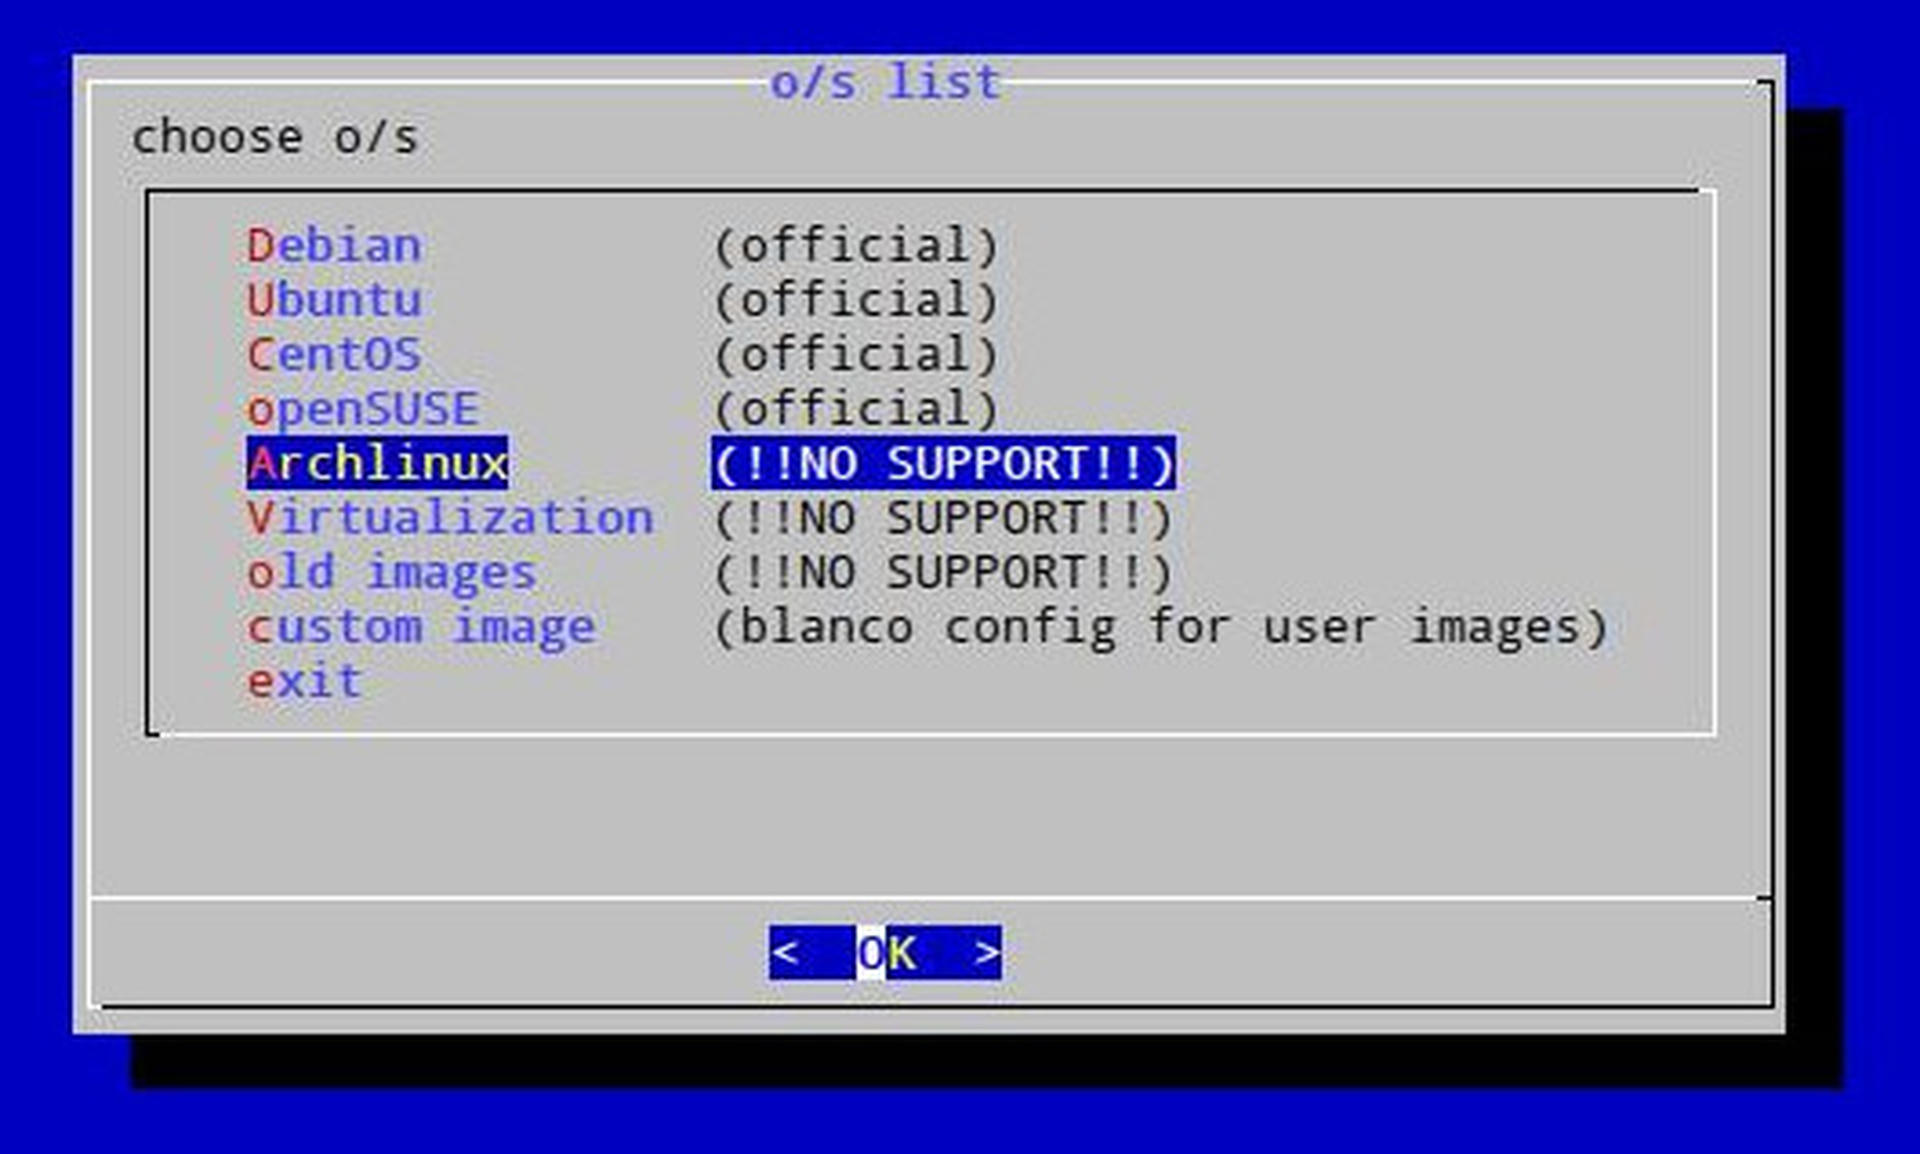
Much to my joy, Hetzner offers Arch Linux as part of their Install Image. Their install scripts are very general though, and installing a different choice is a similar process.
Rescue Me!
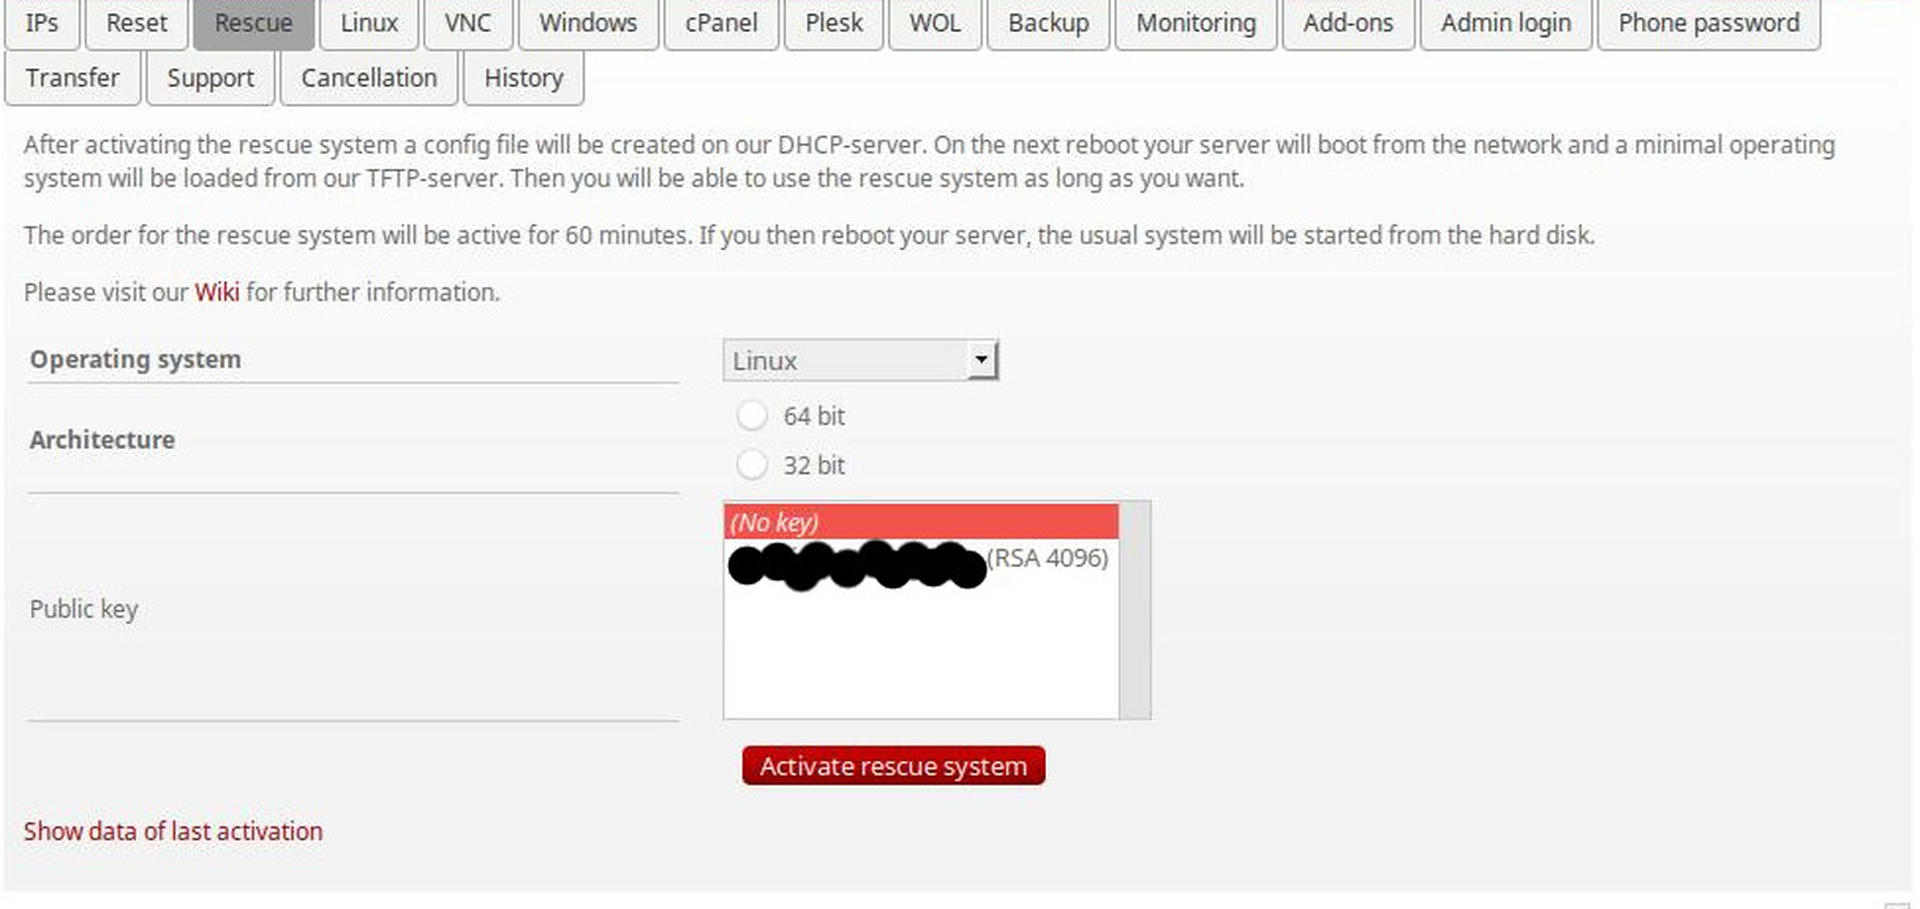
All providers are different in how this process will work. Some will have more options, some will be graphical, others will be more buggy. It's very important you become familiar with this process and understand what you're doing. You don't want to accidently wipe your machine, or find yourself in an emergency reinstall situation then realize you don't know how to set things up.
With Hetzner you can select a rescue image from their web UI allows you to SSH in using your pre-provided key. You can also generally choose premade images from a similar panel of the web UI, in Hetzner's UI has this under the "Linux" tab.
From this system, you can either run something like the provided installimage or install your own system. Since we want to experiment let's just install our own! If you choose to use installimage you'll find it to be very painless.
Getting the Image
First, we'll pull down our ISO image. This snippet will discover, fetch, and verify the latest Arch Linux chroot bootstrap. You're able to just paste it into your ssh session.
VERSION=$(curl https://mirrors.kernel.org/archlinux/iso/latest/ | grep -Poh '(?<=archlinux-bootstrap-)\d*\.\d*\.\d*(?=\-x86_64)' | head -n 1)
curl https://mirrors.kernel.org/archlinux/iso/latest/archlinux-bootstrap-$VERSION-x86_64.tar.gz -o /tmp/archlinux-bootstrap-$VERSION-x86_64.tar.gz
curl https://mirrors.kernel.org/archlinux/iso/latest/archlinux-bootstrap-$VERSION-x86_64.tar.gz.sig -o /tmp/archlinux-bootstrap-$VERSION-x86_64.tar.gz.sig
# Pull Pierre Schmitz PGP Key.
# https://www.archlinux.org/people/developers/#pierre
# http://pgp.mit.edu:11371/pks/lookup?op=vindex&fingerprint=on&exact=on&search=0x4AA4767BBC9C4B1D18AE28B77F2D434B9741E8AC
gpg --keyserver pgp.mit.edu --recv-keys 9741E8AC
# Verify its integrity.
gpg --verify /tmp/archlinux-bootstrap-$VERSION-x86_64.tar.gz.sig
You should get some output saying the signature was good. That means we can use it! We know this image is legitimate because we:
- Know Pierre is an Arch Linux developer.
- Know that we have his key from a trusted server at MIT.
- Downloaded the archive and the signature from an
httpssource. - Verified the archive.
Wasn't that hard? No, no it wasn't. It took us barely any time at all.
Foundational File Systems
You can review your available drives with this:
lsblk --paths --scsiAnd you should see some output like so:
NAME       SIZE OWNER GROUP MODE       NAME     HCTL       TYPE VENDOR   MODEL             REV TRAN
/dev/sda 232.9G root  disk  brw-rw+++- /dev/sda 1:0:0:0    disk ATA      Crucial_CT250MX2 MU03 sata
/dev/sdb 232.9G root  disk  brw-rw+++- /dev/sdb 2:0:0:0    disk ATA      Crucial_CT250MX2 MU03 sata
For our configuration, we'll use the btrfs filesystem which supports multiple devices. You may wish to review the Arch wiki page as well.
I'm choosing to map both my whole disks into a btrfs volume with mirroring across disks. This should give me consistency against disk failures.
HOSTNAME=silicon
mkfs.btrfs -f -L $HOSTNAME -d raid1 -m raid1 /dev/sda /dev/sdb
If your drives are solid state this process will also issue full TRIM commands to them which is good.
You can test that the RAID is working by doing this:
# Make folders for them.
mkdir -p /mnt/sda
mkdir -p /mnt/sdb
# Make a test write.
mount /dev/sda /mnt/sda
echo "Hello World" > /mnt/sda/hello
umount /mnt/sda
# Make a test read.
mount /dev/sdb /mnt/sdb
cat /mnt/sdb/hello
# Returns "Hello World" from the file.
rm /mnt/sdb/hello
umount /mnt/sdb
Cool huh? So if your one drives ever dies the other should continue to function. It's like a backup! But it isn't. This won't protect you from stupidity or attacks. If you'd prefer to have more space use -d raid0 to enable striping instead when running mkfs.btrfs.
If you need to sync the raid mirroring because you have a new disk you can do btrfs balance start. I've never actually had a case where I've used this failsafe, so if anyone has experience with it I'd definitely appreciate your feedback.
Next we'll set up some initial mountpoints and subvolumes.
mount -o compress=lzo /dev/sda /mnt
# Will go on /
btrfs subvolume create /mnt/root
# Will go on /home
btrfs subvolume create /mnt/home
# Will go on /var/cache/pacman
btrfs subvolume create /mnt/pacman-cache
# Will go on /var/cache/abs
btrfs subvolume create /mnt/abs-cache
BTRFS is a 'Copy-on-Write' filesystem and we can use these subvolumes like we would partitions. We get a few other cool features though, we can take (basically) free snapshots of them whenever we want, and we can easily send and recieve them. These snapshots behave just like folders for everyday use.
Creating seperate root, home and *-cache filesystems is done for a few reasons.
rootwill be the core of our system, and what runs day-to-day. We make this a subvolume so we can take snapshots of our running system and use them later in case something goes wrong. It's fairly cheap to make snapshots of this since the only things that will change are updated packages and configurations.homeis where you store all of the user data. This data is, generally, version independent of what's running on your system. It's unlikely if you roll backrootyou'll also want to lose your latest changes tohome.pacman-cacheis where we'll store the Arch Linux official repository caches. It stores previous and current versions of packages installed. Along with theabs-cachethese are likely things you'll want to share between all snapshots.abs-cacheis where we'll store our ABS tree cache. It stores builds from the AUR.
You may be asking "Why not a seperate boot?" and that's an extremely good question! From my experience, one thing that happens when you use a seperate boot is your kernel version starts to conflict with various modules (such as ntfs-3g) when the kernel is new but the root is old. This is a new strategy I'm trying. Another reason no boot was made is because we're not encrypting the disk, so there is no need.
Now let's mount things in their destined paths:
umount /dev/sda
mount -o subvol=root /dev/sda /mnt
mkdir -p /mnt/home
mount -o subvol=home /dev/sda /mnt/home
mkdir -p /mnt/var/cache/pacman
mount -o subvol=pacman-cache /dev/sda /mnt/var/cache/pacman
mkdir -p /mnt/var/cache/abs
mount -o subvol=abs-cache /dev/sda /mnt/var/cache/abs
Bootstrapping to Base
With our filesystem and subvolumes mounted, it's time to install Arch Linux.
cd /mnt
tar --strip-components 1 --extract --preserve-permissions --gzip --file=/tmp/archlinux-bootstrap-$VERSION-x86_64.tar.gz
If you issue an ls things should now look like a normal happy Linux installation. From here you can chroot in with the following command:
./bin/arch-chroot .The environment we find ourself in is very minimal, it doesn't even contain a full copy of base! But from here, we can do everything! You should see something like sh-4.3# as your prompt.
# Setup a mirror.
MIRRORLIST=/etc/pacman.d/mirrorlist
echo -e "Server = https://mirrors.kernel.org/archlinux/\$repo/os/\$arch\n`cat $MIRRORLIST`" > $MIRRORLIST
# Setup Keys
pacman-key --init
pacman-key --populate archlinux
# Install base, must do this before locales since we don't have sed installed!
pacman -Syu --noconfirm base btrfs-progs
# Configure Locales
LOCALES=/etc/locale.gen
echo -e "en_CA.UTF-8 UTF-8\nde_DE.UTF-8 UTF-8\n`cat $LOCALES`" > $LOCALES
locale-gen
Next we need to configure the /etc/fstab file to make sure the boot process is able to understand what's happening. At this point you're likely noticing you don't have a text editor. Let's keep it that way for now, just for fun. You can review the syntax with cat /etc/fstab.
cat << EOF >> /etc/fstab
/dev/sda    /                   btrfs   subvol=root,rw,relatime,ssd,space_cache,compress=lzo            0   0
/dev/sda    /home               btrfs   subvol=home,rw,relatime,ssd,space_cache,compress=lzo            0   0
/dev/sda    /var/cache/pacman   btrfs   subvol=pacman-cache,rw,relatime,ssd,space_cache,compress=lzo    0   0
/dev/sda    /var/cache/abs      btrfs   subvol=abs-cache,rw,relatime,ssd,space_cache,compress=lzo       0   0
EOF
At this point, we're almost done our base installation.
User Creation
Since you don't want to normally operate as root on your server it's a good idea to create a new user. Let's quickly configure sudo first so when we get our new user working we can still do fun things.
pacman -S sudo
EDITOR=nvim visudo
In here you want to enable users in the sudo group to utilize sudo, uncomment the following line:
%sudo ALL=(ALL) ALLThen you can create the group:
groupadd sudoFinally, create your new user:
USER=hoverbear
useradd -m -G sudo $USER
passwd hoverbear
Finally, grab your public keys and set up for your user.
GITHUB_USER=hoverbear
su $USER -c "mkdir -p /home/$USER/.ssh && curl -o /home/$USER/.ssh/authorized_keys https://github.com/$GITHUB_USER.keys && chmod 600 /home/$USER/.ssh/authorized_keys"
SSH
Obviously we need to run SSH to access our new install. At this point, let's finally install our editor. I like neovim for strange reason, but you can pick other things.
EDITOR=neovim
pacman -S openssh $EDITOR
Now you can open /etc/ssh/sshd_config. Read through everything here! I'm going to tweak the following knobs:
PermitRootLogin no
# Only let specific users log in.
AllowUsers hoverbear
# Use a big key.
ServerKeyBits 4096
# We'll use SSH keys only.
PasswordAuthentication no
ChallengeResponseAuthentication no
We'll enable both sshd which will give us remote access when we reboot:
systemctl enable sshdNetworking
We'll just quickly set up a basic networking configuration for now which we can build on later. First we'll enable the two services needed:
systemctl enable systemd-networkd
systemctl enable systemd-resolved
ln -s /run/systemd/resolve/resolv.conf /etc/resolv.conf
Then we'll create the necessary files.
cat << EOF > /etc/systemd/network/physical.network
[Match]
# Make sure this matches your adapter from the ip addr command
Name=enp*

[Network]
DHCP=ipv4
EOF
Booting
Dealing with bootloaders is usually fairly arcane in my experience, and debugging a remote boot sounds just awful. We want something basically failsafe. If something does go wrong, we want to be able to fix it from the rescue system. Let's take the recommended solution of Arch, Grub.
pacman -S --noconfirm grub
grub-mkconfig -o /boot/grub/grub.cfg
grub-install /dev/sda
The Moment of Truth!
You can get out of your chroot with exit, then reboot the machine.
rebootWith any luck, in a few minutes you'll be able to ssh in again. I found with Hetzner you may need to issue an automatic reset from their online console, you might need to as well.
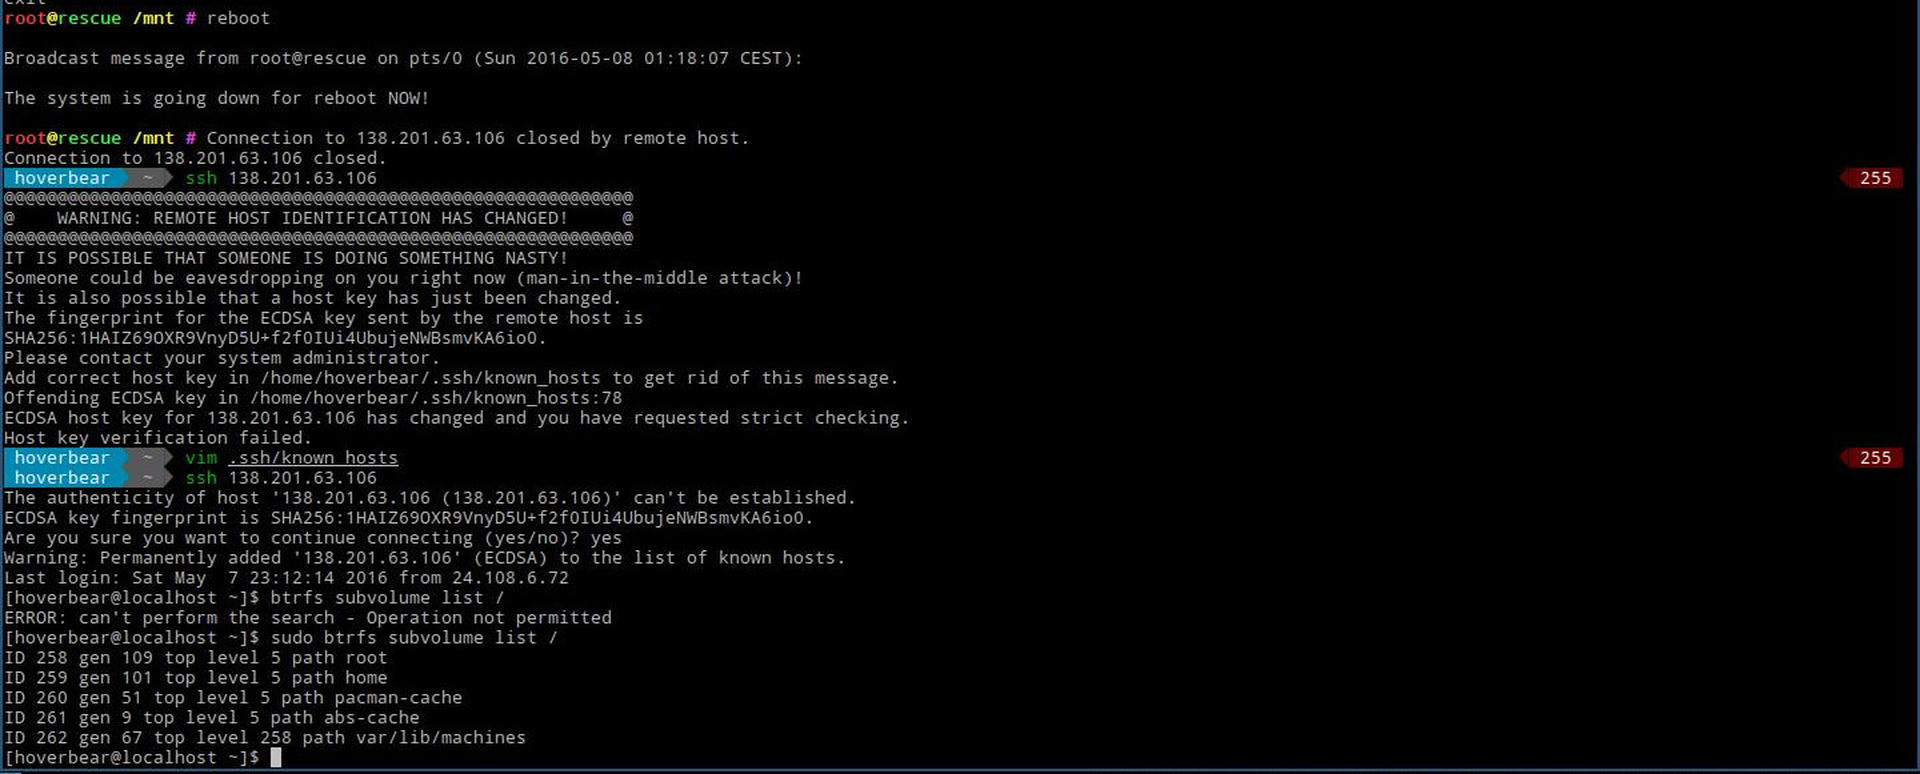
In our next post we'll talk about configuring your server's services and doing some hardening.