Rust is probably my favorite programming language (as the contents of this site suggests). My interests in networks, development operations, and systems programming align strongly with Rust. They're pursuing the trifecta: Safe, Fast, Concurrent. It's been a great learning journey for me so far and I learnt to write better code in all languages.
Github Pages is Github's very generous offering of web hosting to your projects. Basically, you create a branch gh-pages and push it to Github, then browse to https://$USERNAME.github.io/$REPOSITORY.
TravisCI offers free continuous integration for open-source projects. It's even integrated with rust-ci. I've had a great experience with the service. They're also the source of the little build status buttons like this one  .
.
Today, we'll talk about how to set up your very own Rust project to:
- Automagically build and test your project.
- On a successful test push a new version of your documentation onto a
gh-pagesbranch, as provided byrustdoc.
Making a Demo Project
Let's make a demo repository to play.
cargo new travis-demo
cd travis-demo
For simplicity, we'll replace the contents of src/lib.rs with the following:
#![crate_name = "travis-demo"]
#![crate_type = "lib"]

//! This is a comment.

/// This function always returns true. It's very useful!
pub fn always_true() -> bool { true }

#[test]
fn it_works() {
    assert_eq!(always_true(), true);
}
If you haven't had a chance to learn about
rustdocyou can read about it here.
Now you can run cargo doc and visit a url like file:///Users/hoverbear/travis-demo/target/doc/travis-demo/ to view the generated documentation.

Finally, push this project up to Github (You'll need to make it on Github!):
git add Cargo.toml src .gitignore
git commit -m "Initial commit."
git remote add origin git@github.com:Hoverbear/travis-demo.git
git push -u origin master
Starting with Travis
First, you'll need to sign up with Travis. This is trivially done by visiting TravisCI and signing in with Github.
Then, visit your profile by clicking on your name in the top right corner.

On this page, in the "Repositories" tab, you'll see a list of all your public repositories. If you just made your repository you might need to tell Travis to Sync Now.
Travis has a
.comfor your private repositories.
Now enable our demo repository by flipping the switch.
Feel encouraged to take a moment to click on the wrench and explore the options Travis offers. We'll play with them in a minute!
Set up your Repository
KMC offers us a more secure approach for users who do not wish to permit Travis to push to their repositories.
Travis uses a .travis.yml to configure how it works. You can read more about it here.
We can add the following to ours:
language: rust
after_success: |
  [ $TRAVIS_BRANCH = master ] &&
  [ $TRAVIS_PULL_REQUEST = false ] &&
  cargo doc &&
  echo "<meta http-equiv=refresh content=0;url=`echo $TRAVIS_REPO_SLUG | cut -d '/' -f 2`/index.html>" > target/doc/index.html &&
  sudo pip install ghp-import &&
  ghp-import -n target/doc &&
  git push -fq https://${GH_TOKEN}@github.com/${TRAVIS_REPO_SLUG}.git gh-pages
language: lets us specify rust, which for now defaults to the latest nightly.
after_success: lets us declare a script to run after a successful build. I found this series of steps somewhere, modified them a bit, and they work fantastic. The script basically does the following:
- If it's not a push to
masterfinish. - Otherwise, run
cargo doc - Make a redirect in the
index.htmlto the proper location. (This assumes your repository name is the same as your crate, feel free to change it.) - Pushes the new copy of documentation to Github using a secure token. (More on that in a second.)
But wait! Where do we get the Token?
Giving Travis Permissions
Since it would be positively outrageous to give Travis your Github password or private key, we'll use what's called an "access token". To get one of these, go to your Github settings and hit the "Applictions" tab.
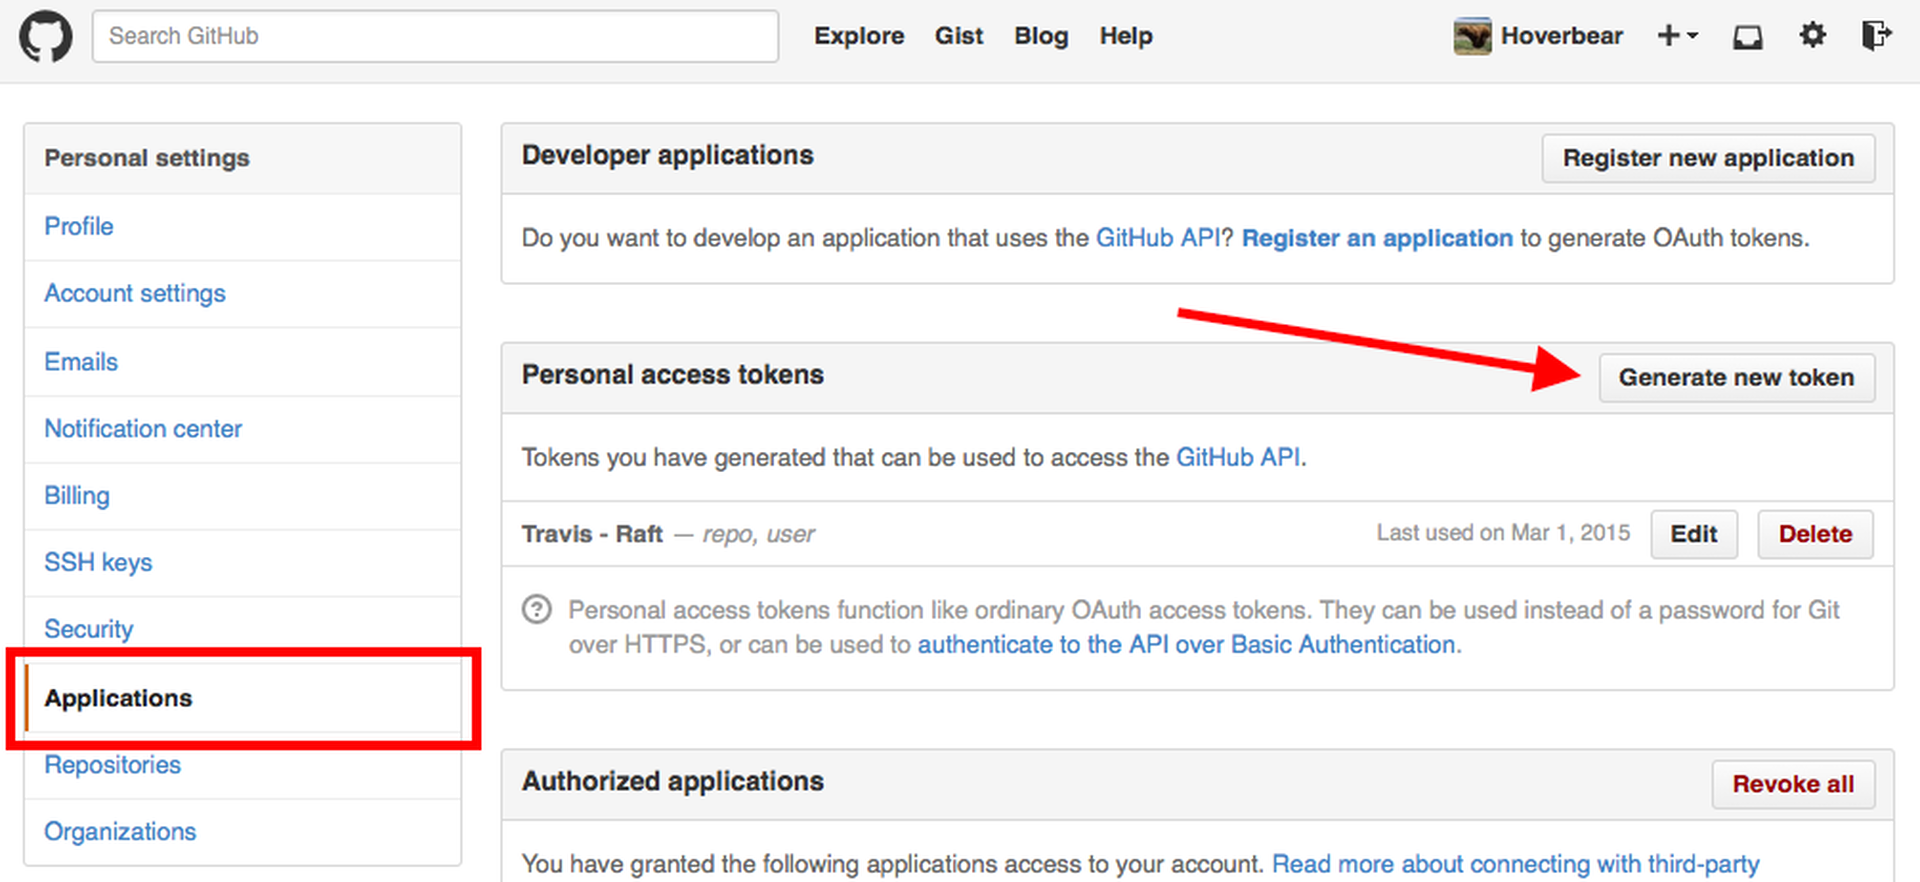
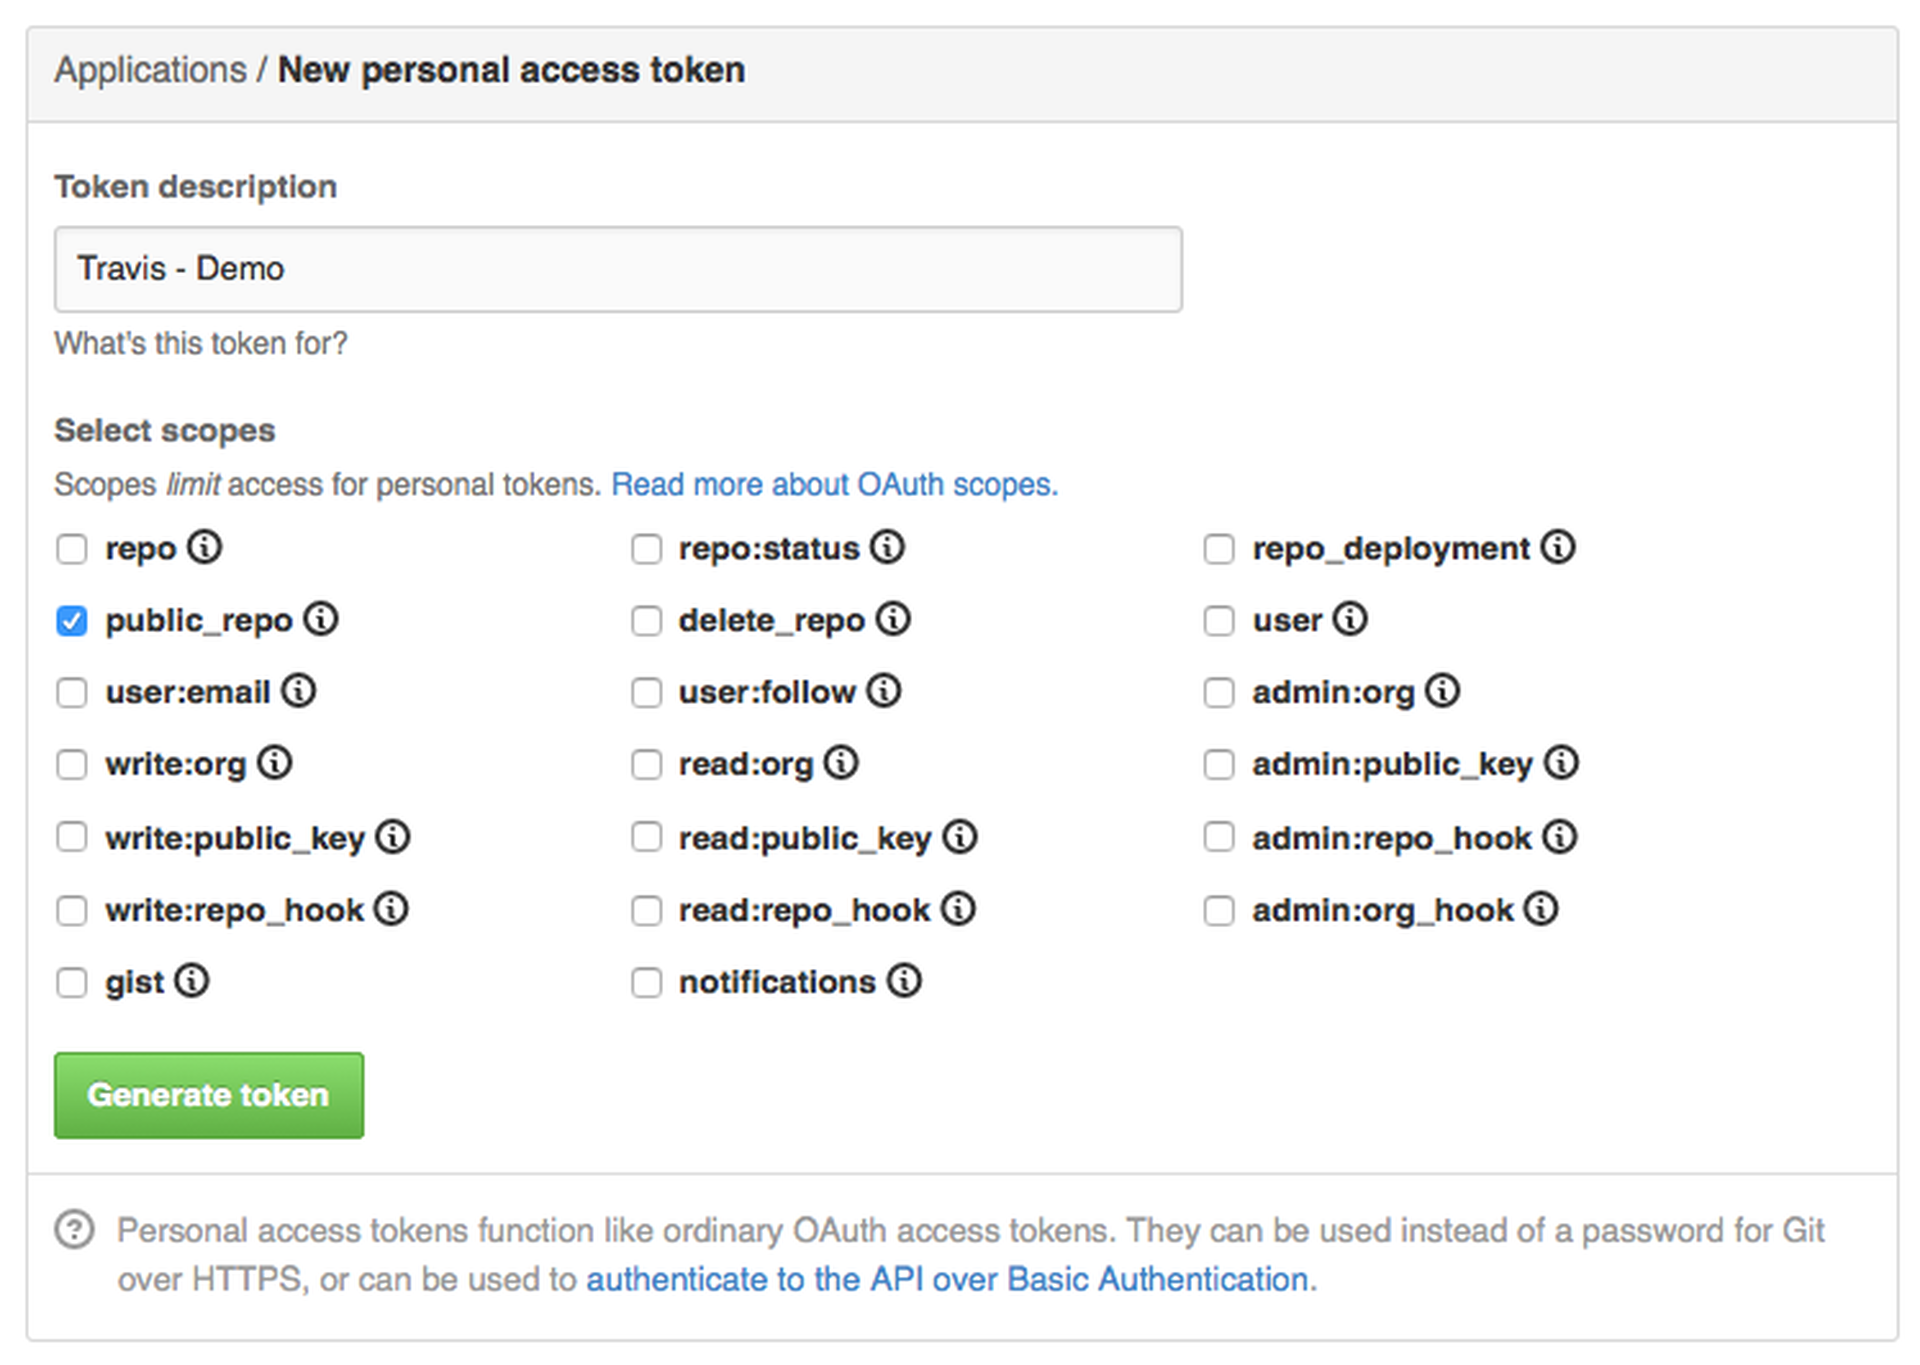
Once you hit "Generate Token" you'll return to the previous page and see a green highlighted key. Copy that, you won't see it again!
Now, install the Travis Gem. Then you need to authenticate using travis login using your Github credentials.
Once Travis is installed and logged in, you can run this, where $YOUR_TOKEN is the one we copied earlier.
travis encrypt GH_TOKEN=$YOUR_TOKEN --add env.globalThis command should automatically add a few lines to your .travis.yml.
Why encrypt? Because it's probably a bad idea to store an access token for your Github account in the clear.
git add .travis.yml
git commit -m "Add Travis"
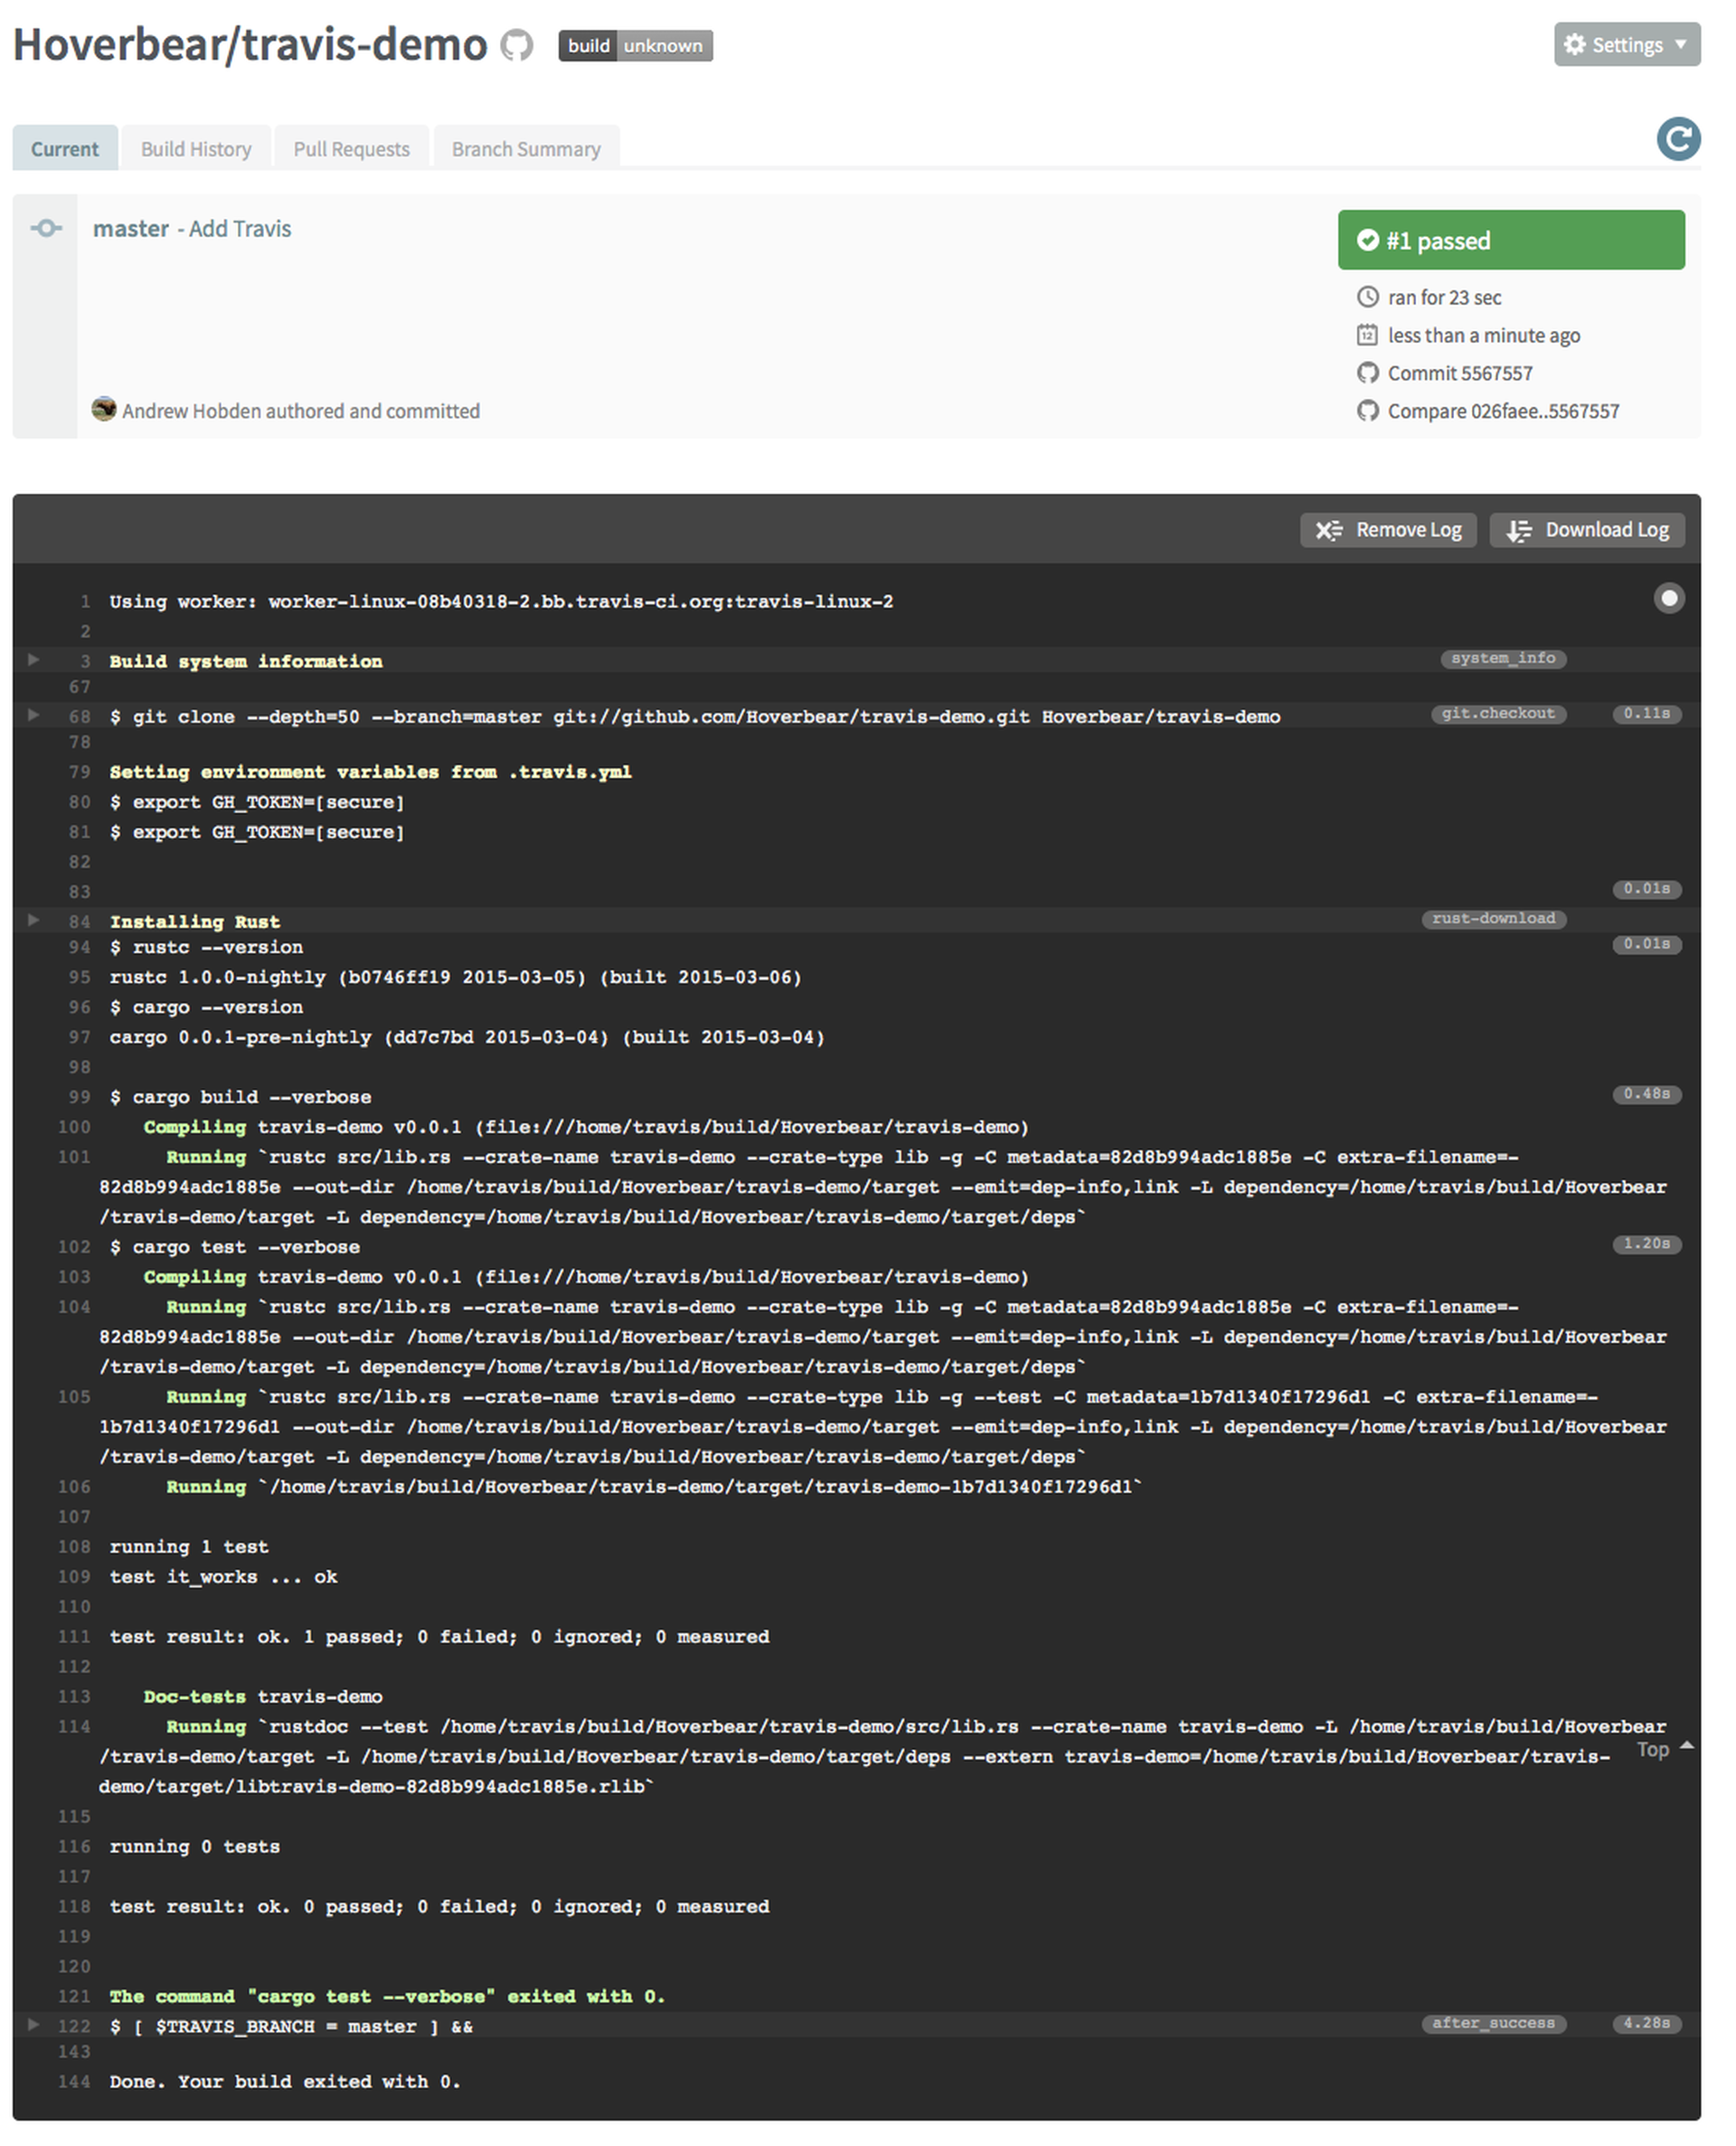
git pushNow if you visit https://travis-ci.org/repositories you should, eventually, see your build pop up! Note that Travis can take a moment to start a build.
Your build should look similar to the following:
Tinkering with the Crate
Unfortunately, the first build of a gh-pages branch can take awhile to become available. So just relax, and lets tinker with things a bit.
Let's go back to your src/lib.rs and add a couple more declarations.
To set a base URL you can add this:
#![doc(html_root_url = "https://hoverbear.github.io/travis-demo/")]To set an image for the documentation you can add an image to your Github repository and do something like the following:
#![doc(html_logo_url = "https://raw.githubusercontent.com/Hoverbear/travis-demo/master/demo.png")]Once you change those, commit them, push it to origin master, and visit Travis again. You can see Travis will take the new revision and test it as well. (You can see there is even a "Build Log") Once the test succeeds you'll see, again, how it builds docs and sets them up.
If you create a pull request or branch, you'll notice that the Travis builds don't push new documentation except to commits on
master.
Tinkering with Travis
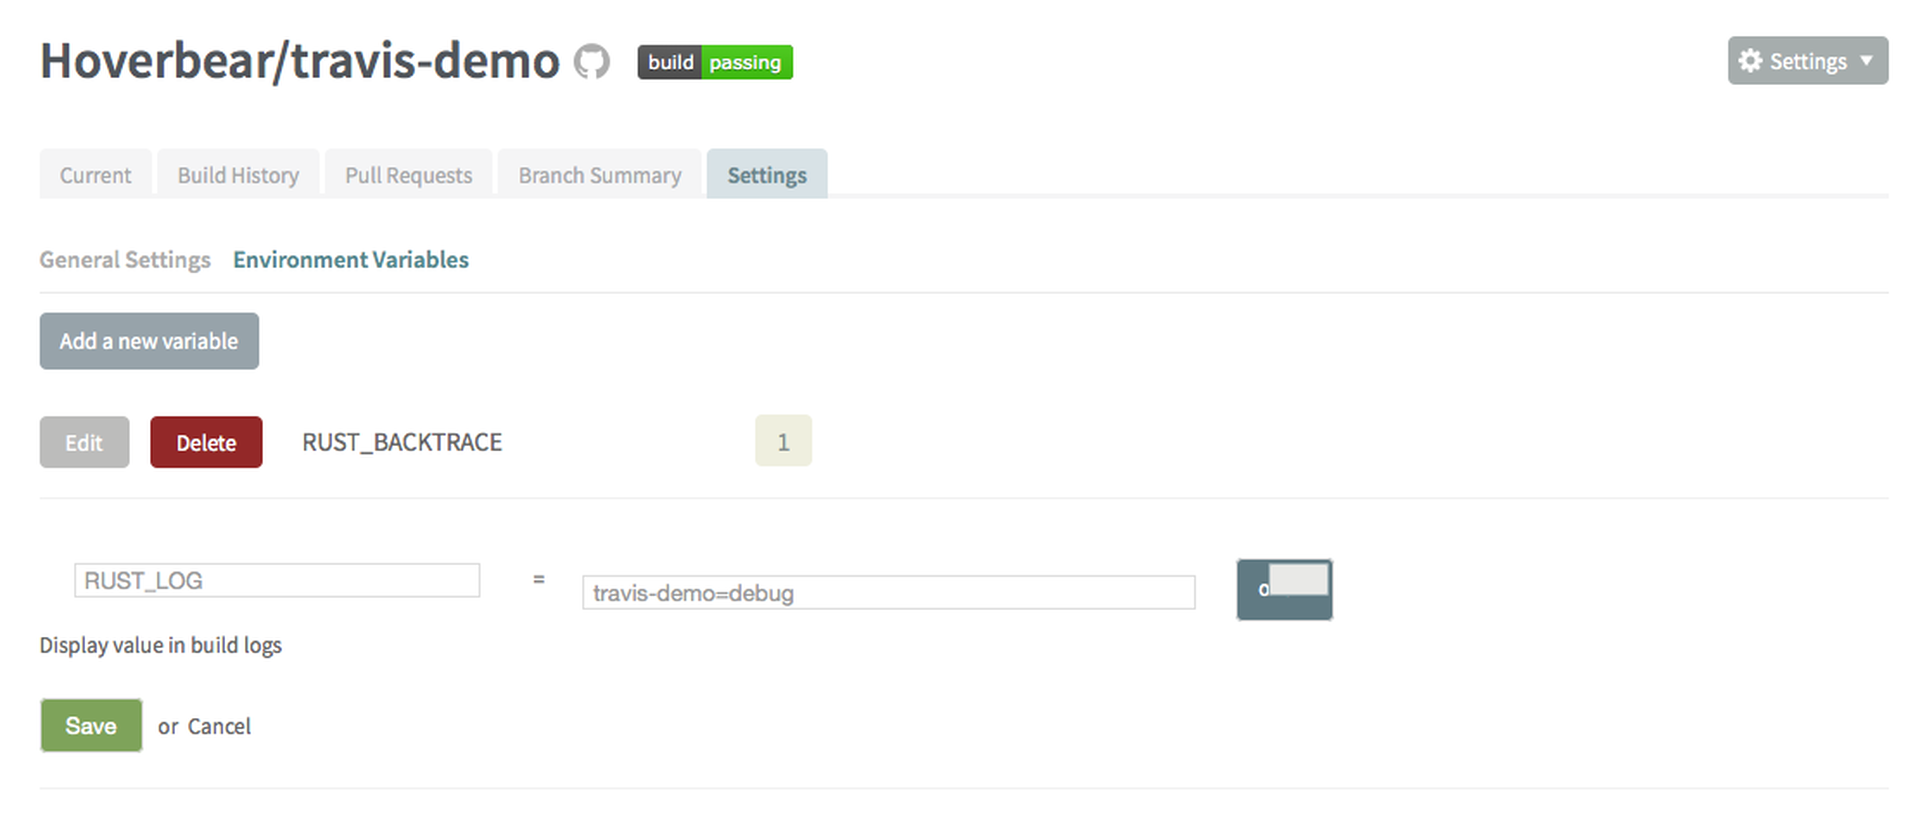
Travis offers us some great options for configuring our output during tests.
The first is RUST_BACKTRACE, we can set it to 1 to make Rust print out a stacktrace on a panic. This is particularly useful combined with panic!(), unreachable!() and unimplemented!() which you can use to structure failure modes in your programs.
If you use log and env-logger you also might want to set RUST_LOG. I would definitely suggest limiting the logging to a specific crate as otherwise rustc and other libs will spout a considerable amount of output.
A While Later...
Try visiting https://$YOUR_GITHUB_USER.github.io/$YOUR_REPO. Did it work? Awesome!
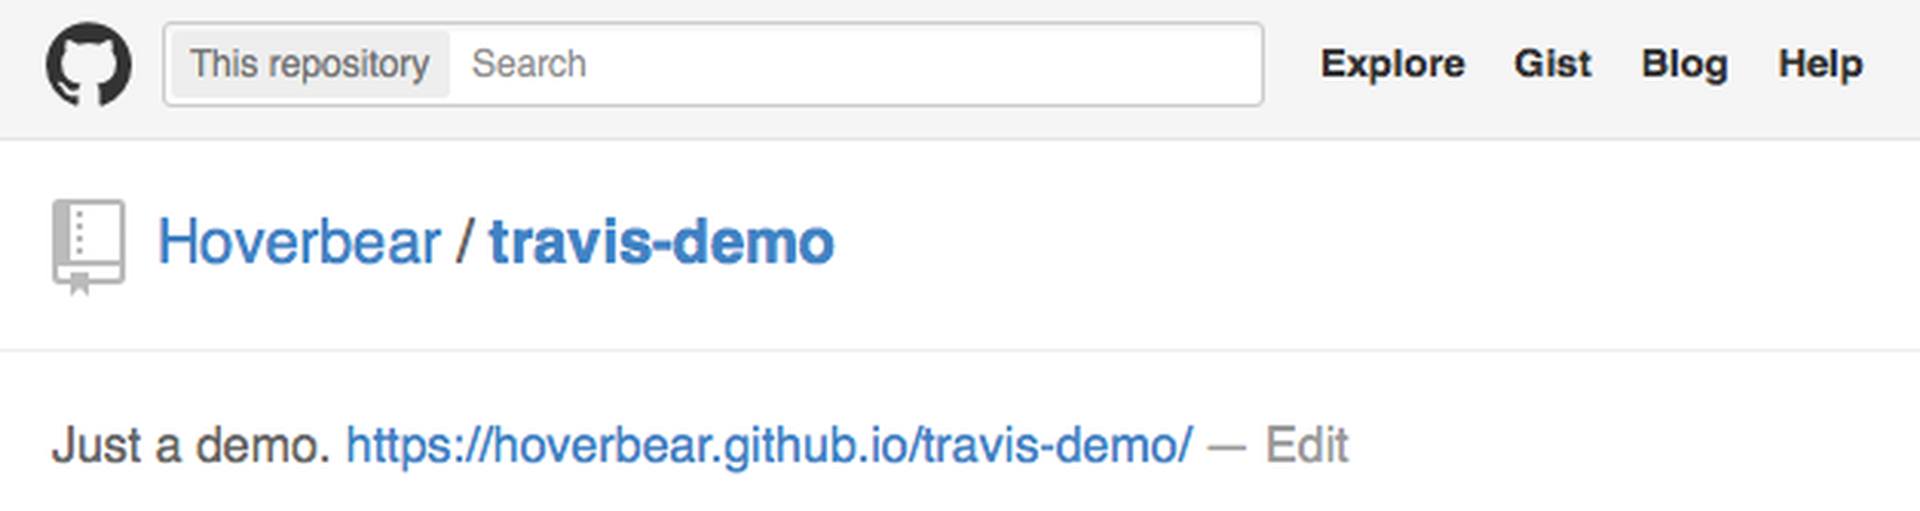
Don't forget to add it to the repository page on Github!
Enjoy your new documentation! Your users will appreciate your documentation being up to date, you don't need to do it yourself, and later on you can hack this method to only handle commits to stable or other tags.